Introduction
Hello!
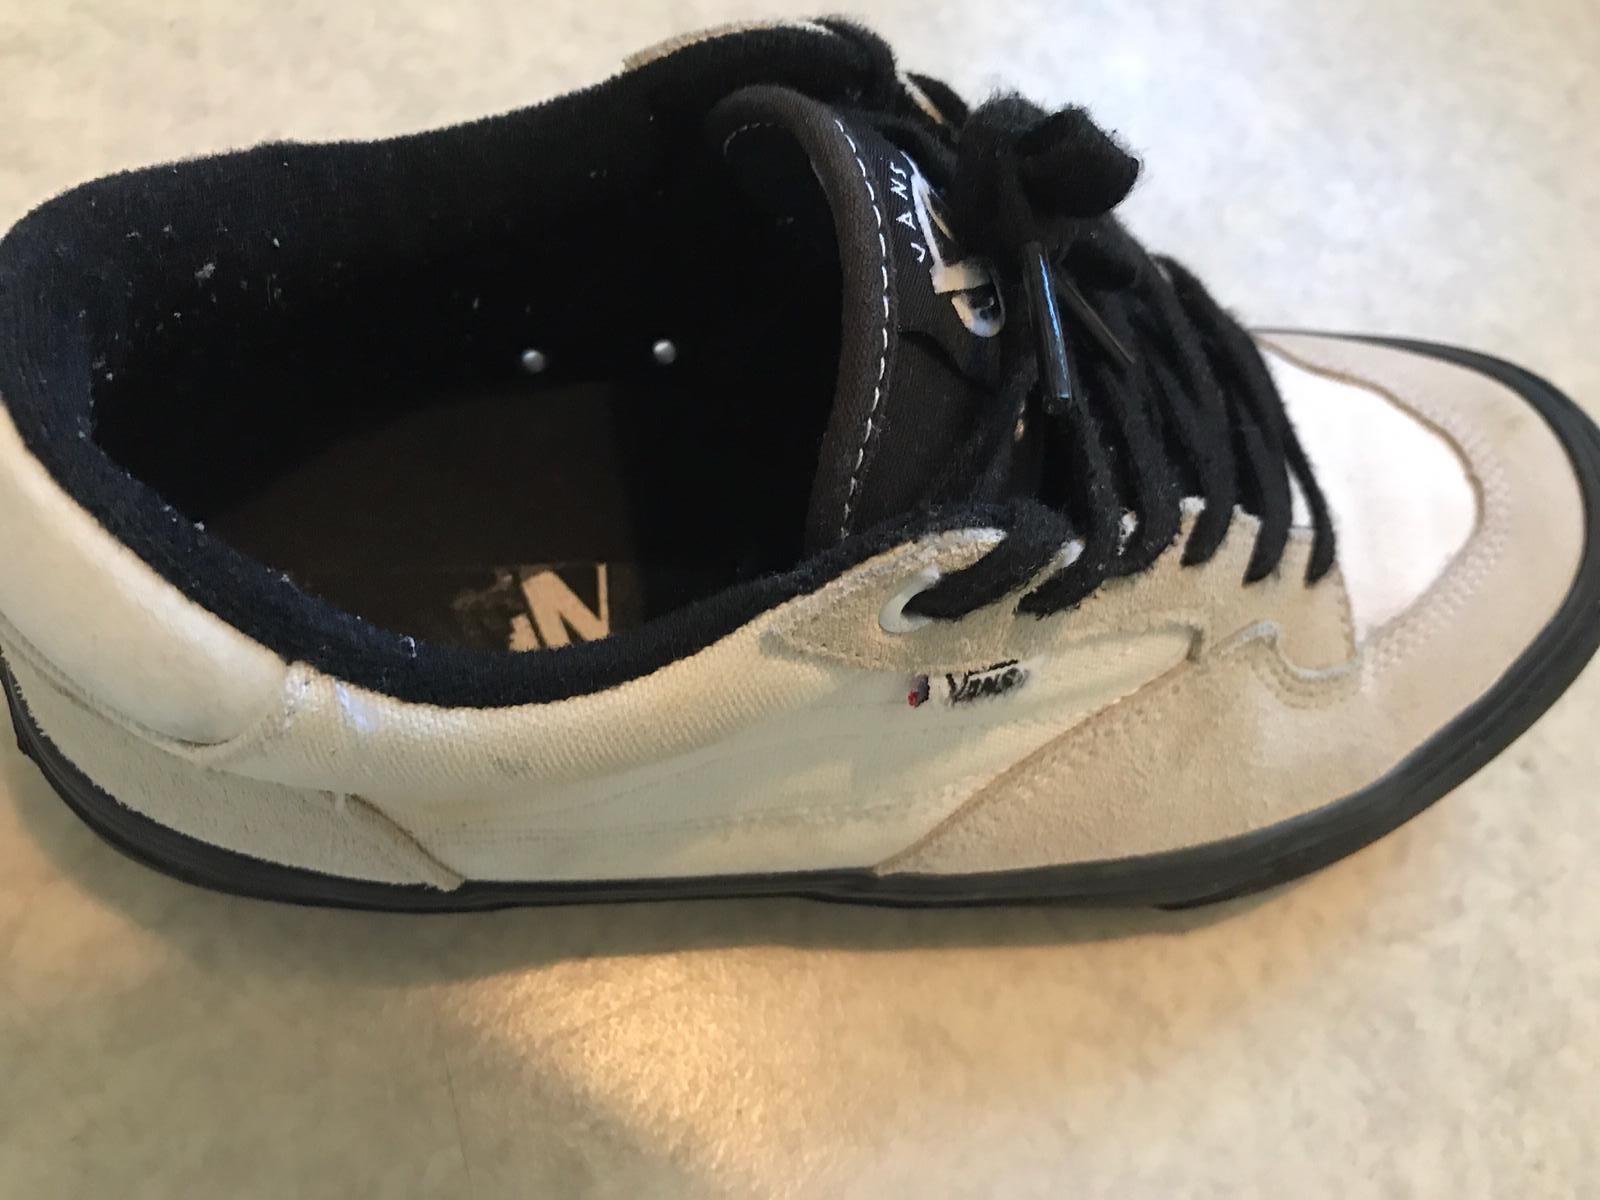
Here’s a guide on how to repair and make skate shoes last longer. Through years of experimentation, I figured out the best ways to repair ollie holes and other issues that every skate shoe eventually succumbs to. In my opinion, the conventional method of using Shoegoo and hot glue sticks is absolutely garbage—they don’t last long and make your shoes look like you busted a nut on them. So, I present my methods of repairing skate shoes that make them more durable and look way more aesthetically pleasing.
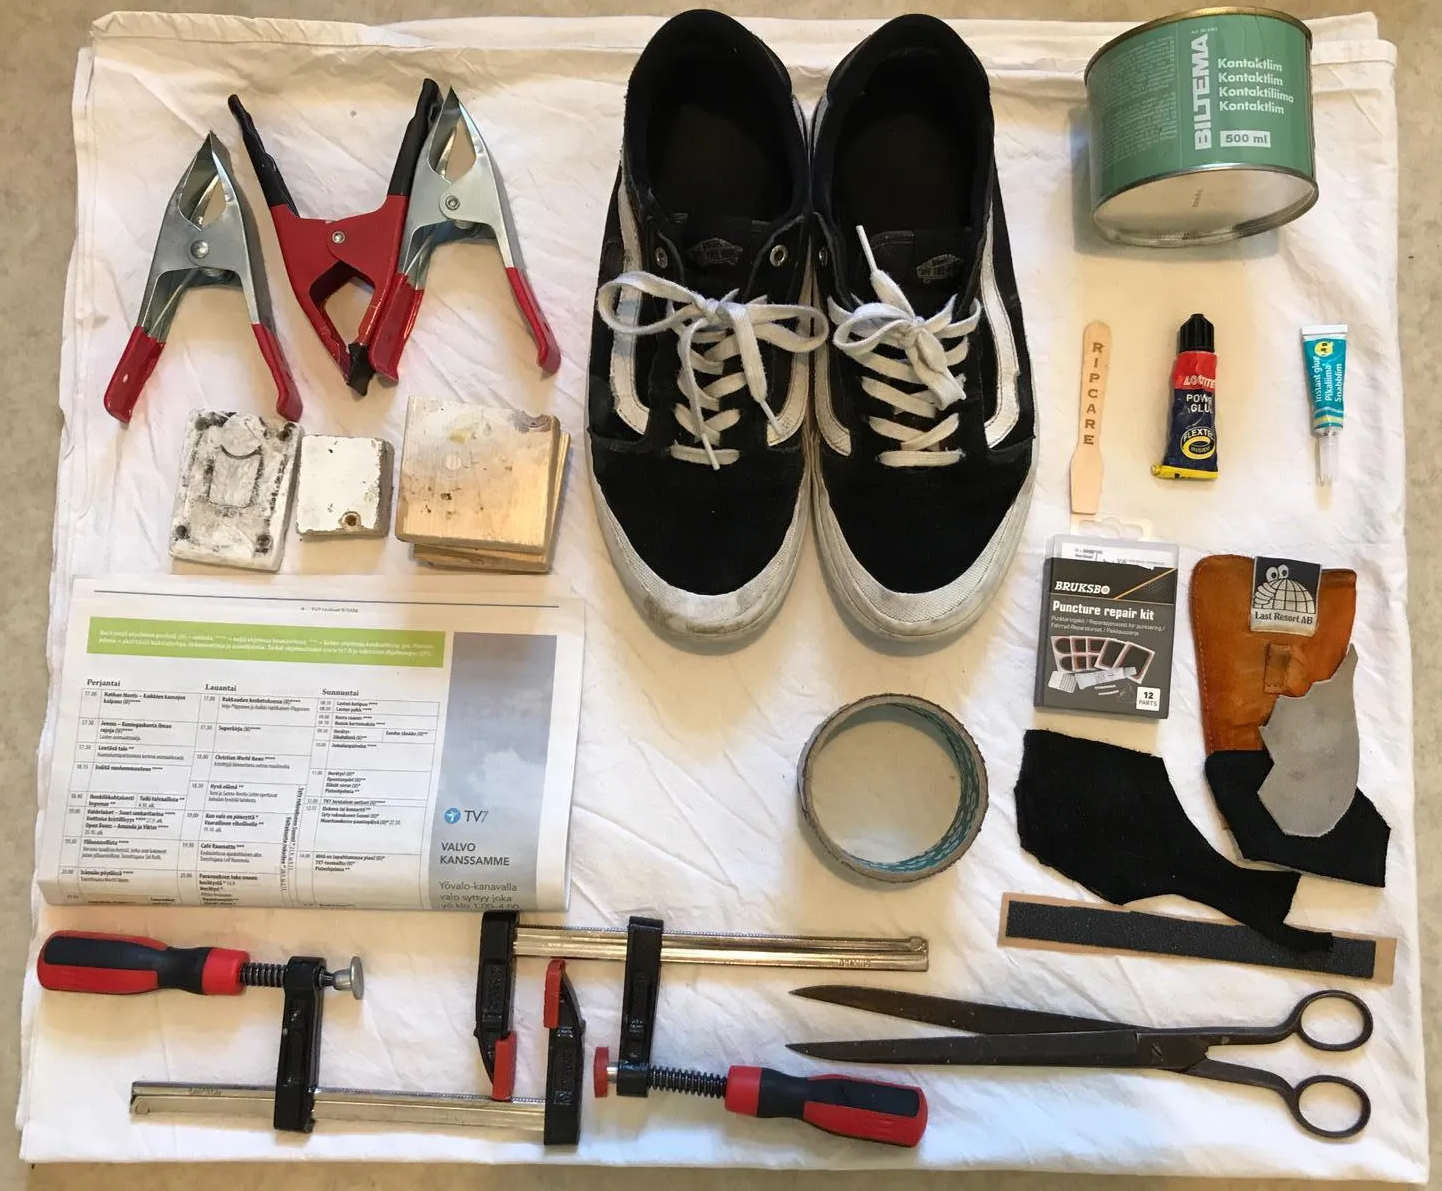
Materials Required
- Contact glue
- Superglue
- Old skate shoe/suede
- Bike tire repair kit
- Scissors
- Spring clamps
- Wooden blocks/riser pads/coins
- Sandpaper/griptape
- F-clamps
- Newspaper
- Marker
- Duct tape
Preventative Measures
SAFETY HAZARD!!! When superglue and cotton/ wool material mixes, it can result in a chemical reaction that can generate immense amount of heat, so only apply a small amount of glue at a time and be careful. Also, the reaction creates fumes that are unpleasant to breath in, make sure you're in a well ventilated area when using superglue.
Obviously, the best way to fix and repair skate shoes is to prevent them from being destroyed to shreds in the first first place. I would highly recommend applying superglue to most stitching and canvas areas of the shoes before skating them.
For protecting stitching on shoes, apply just enough superglue to cover the stitching, you only need to harden them so that it won't rip in a couple session. Even if they do rip eventually, the super glue can keep the suede panels together.
Even though some stitching is ripped, the superglue still holds the panels together.
My Rowans after two months of wear and tear—not much damage, as I kept supergluing and re-gluing the canvas and stitching areas.
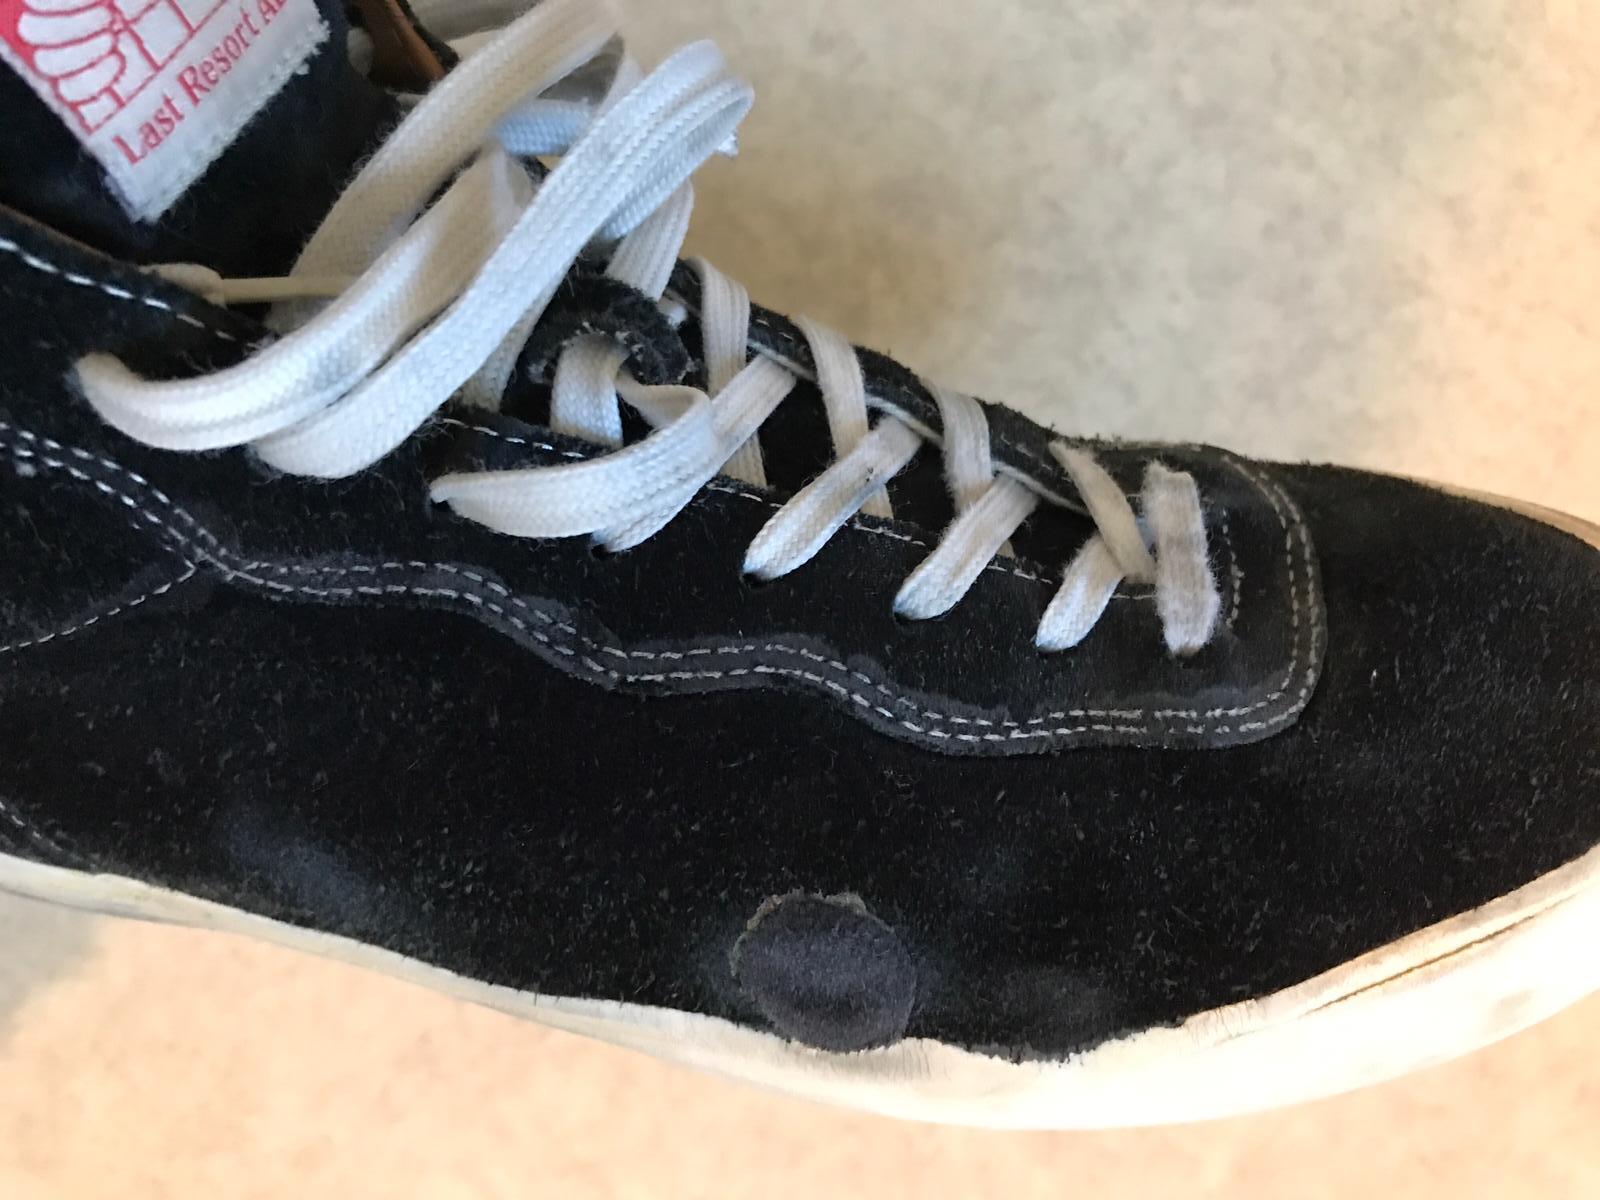
For small rips and little panel separation, a bit of superglue will do the job.
For protecting canvas/knit material, I would recommend skating the shoes for 1-2 sessions first, then notice where the canvas/knit is starting to wear, after that apply small amounts of superglue on to the area. The canvas should feel like a solid once it dries. It's recommended to do this throughout the life of the shoe, as the canvas slowly wears away. Another method is to glue a suede patch on to the canvas area, making it more resistants. You can apply the same method for patching ollie holes for protecting canvas area, which can be found in the next section.

Any knit or mesh skate shoe should be sold with a bottle of superglue. Mesh is super breathable but fail miserably at durability.
Patching Ollie Holes and High-Wear Areas
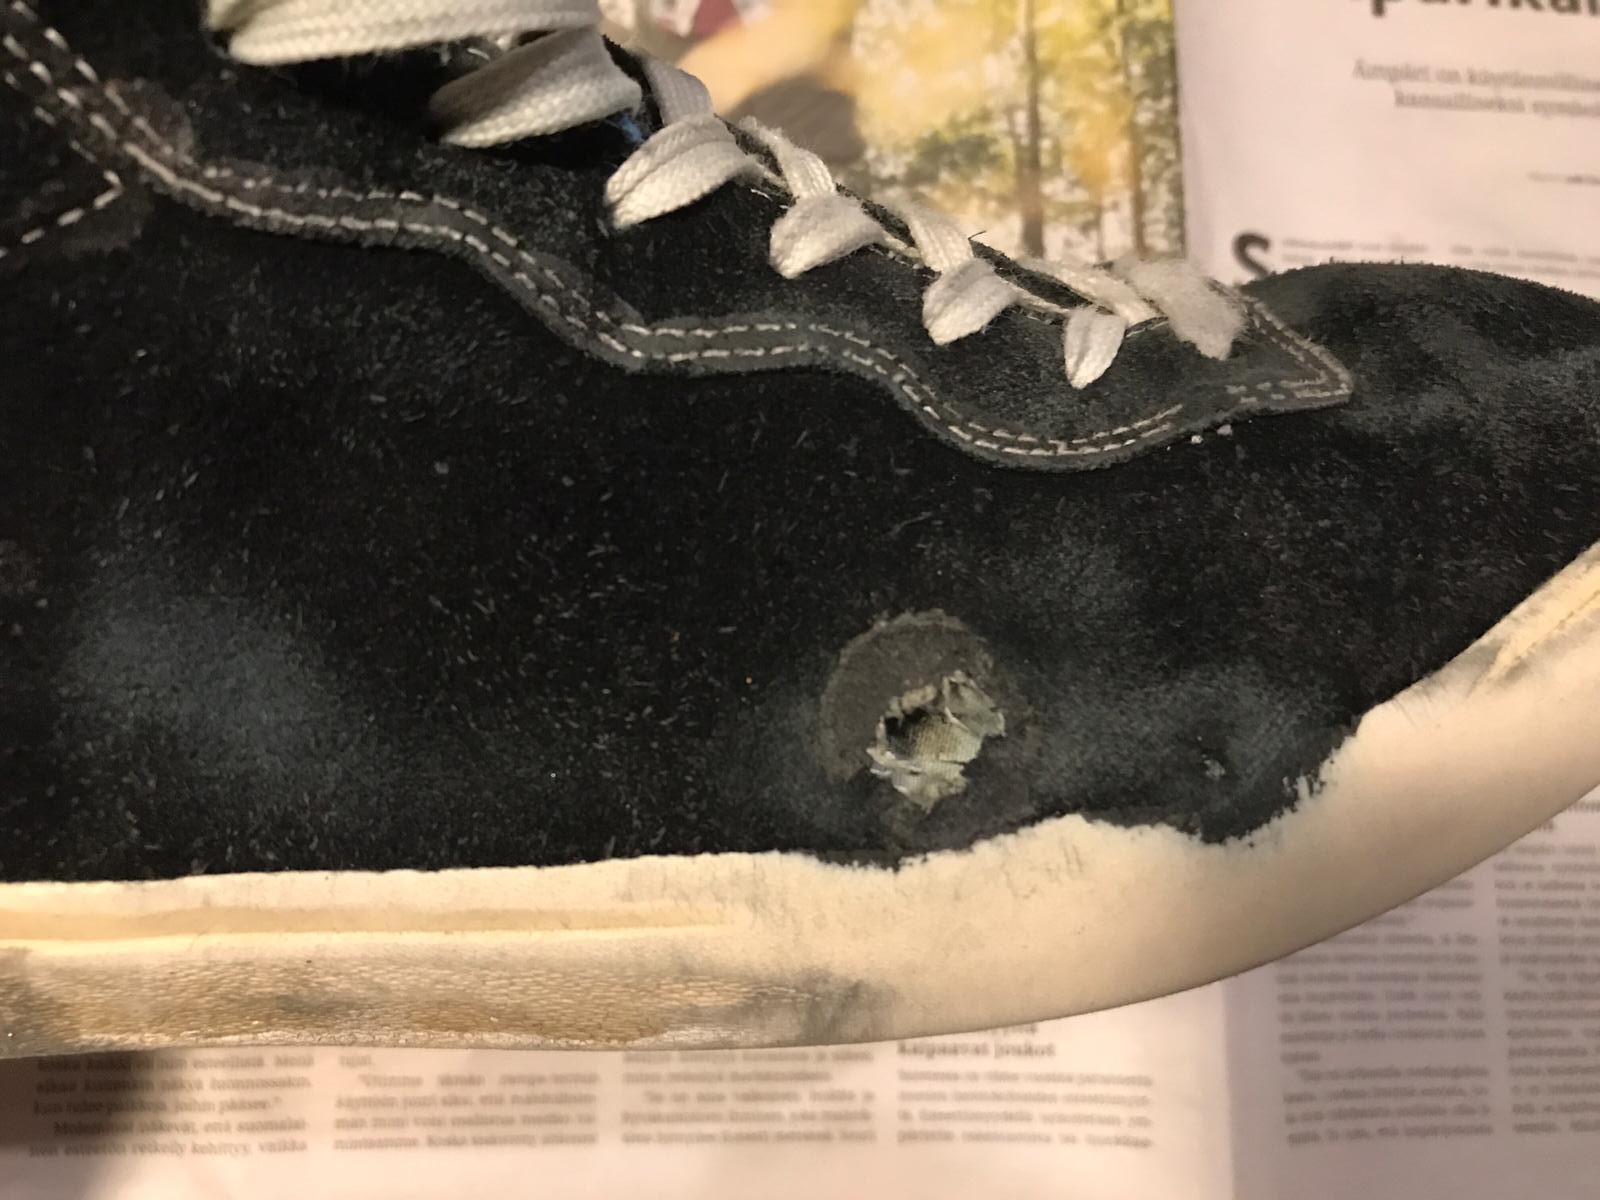
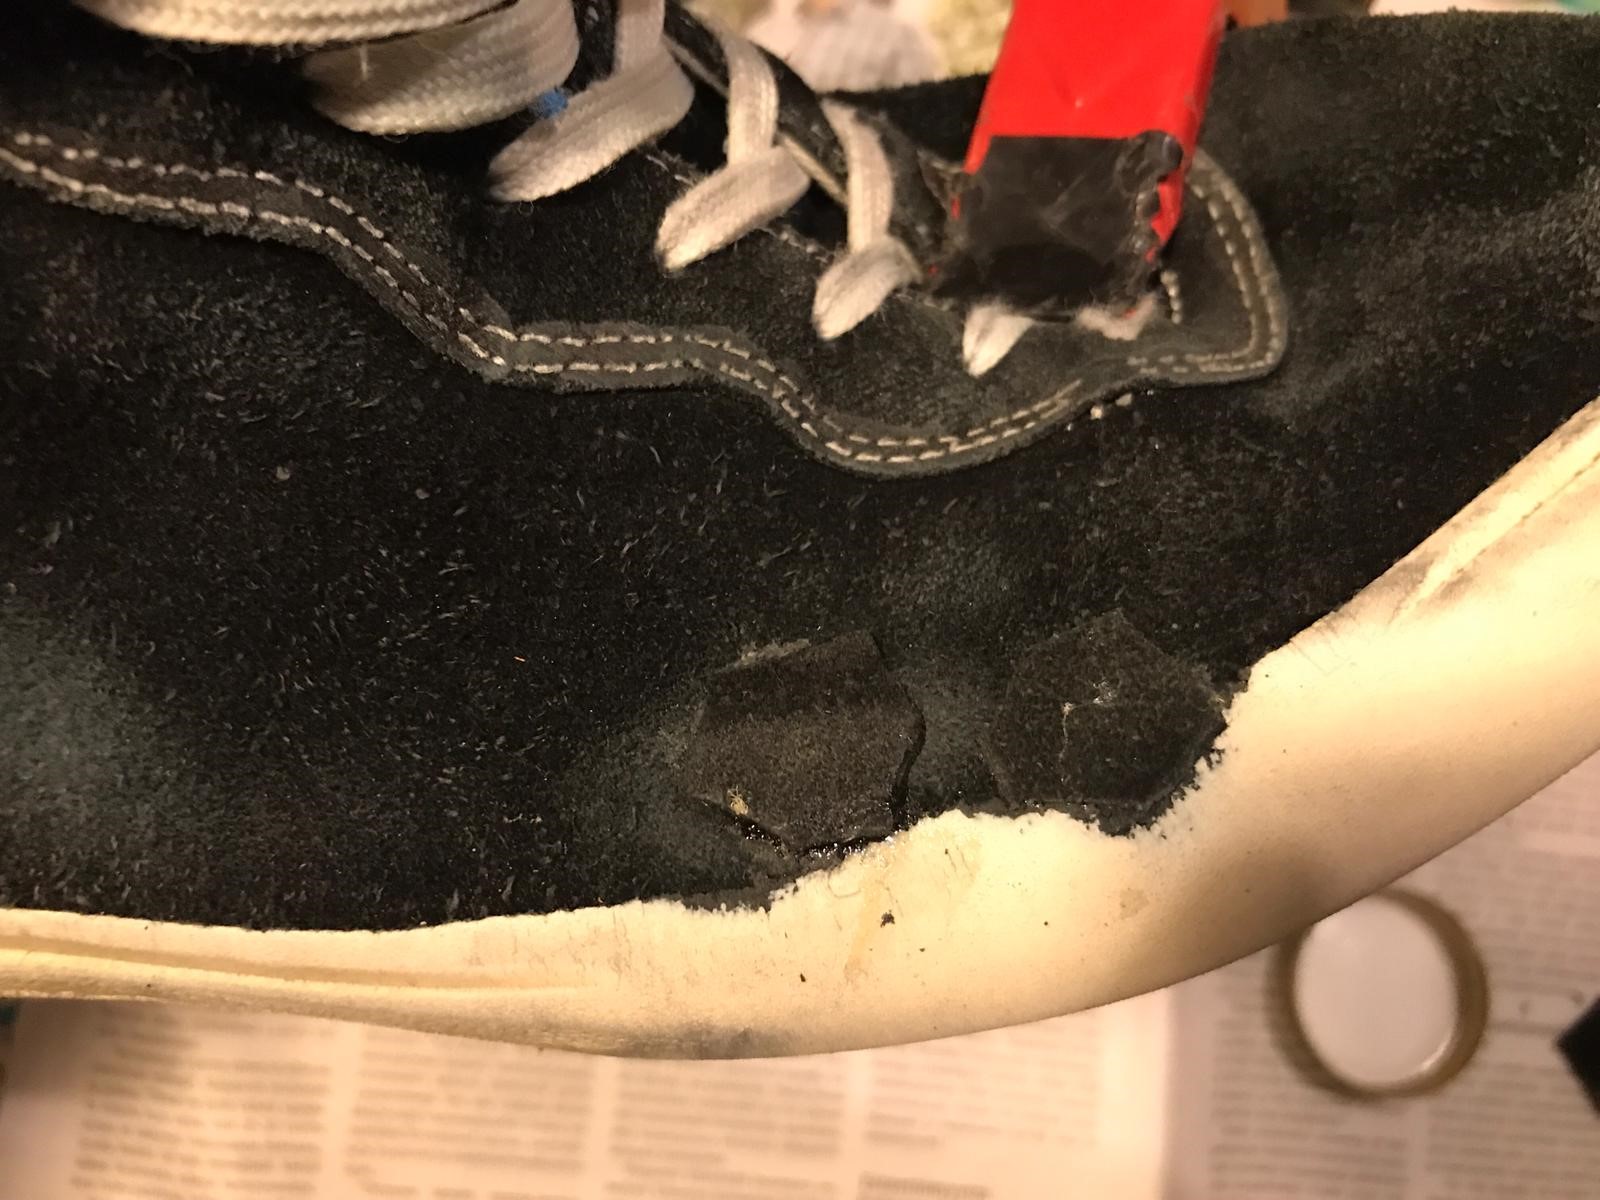
Inevitably, all skate shoes will eventually develop ollie holes. I absolutely hate this, as it’s the quickest-wearing area. This got so annoying that I figured out an efficient and clean method of patching ollie holes. This method can also be used to reinforce weak shoe areas or even make canvas shoes skateable.
First, inspect the hole to see if the suede has fully worn through or there’s still a bit of material left. In this case, I added tape to the inside of the shoe so that the glue does not leak to the inside of the shoe.
Next, roughen the area. Sand the hole and cut a patch of suede slightly larger than it. Sand the patch as well.
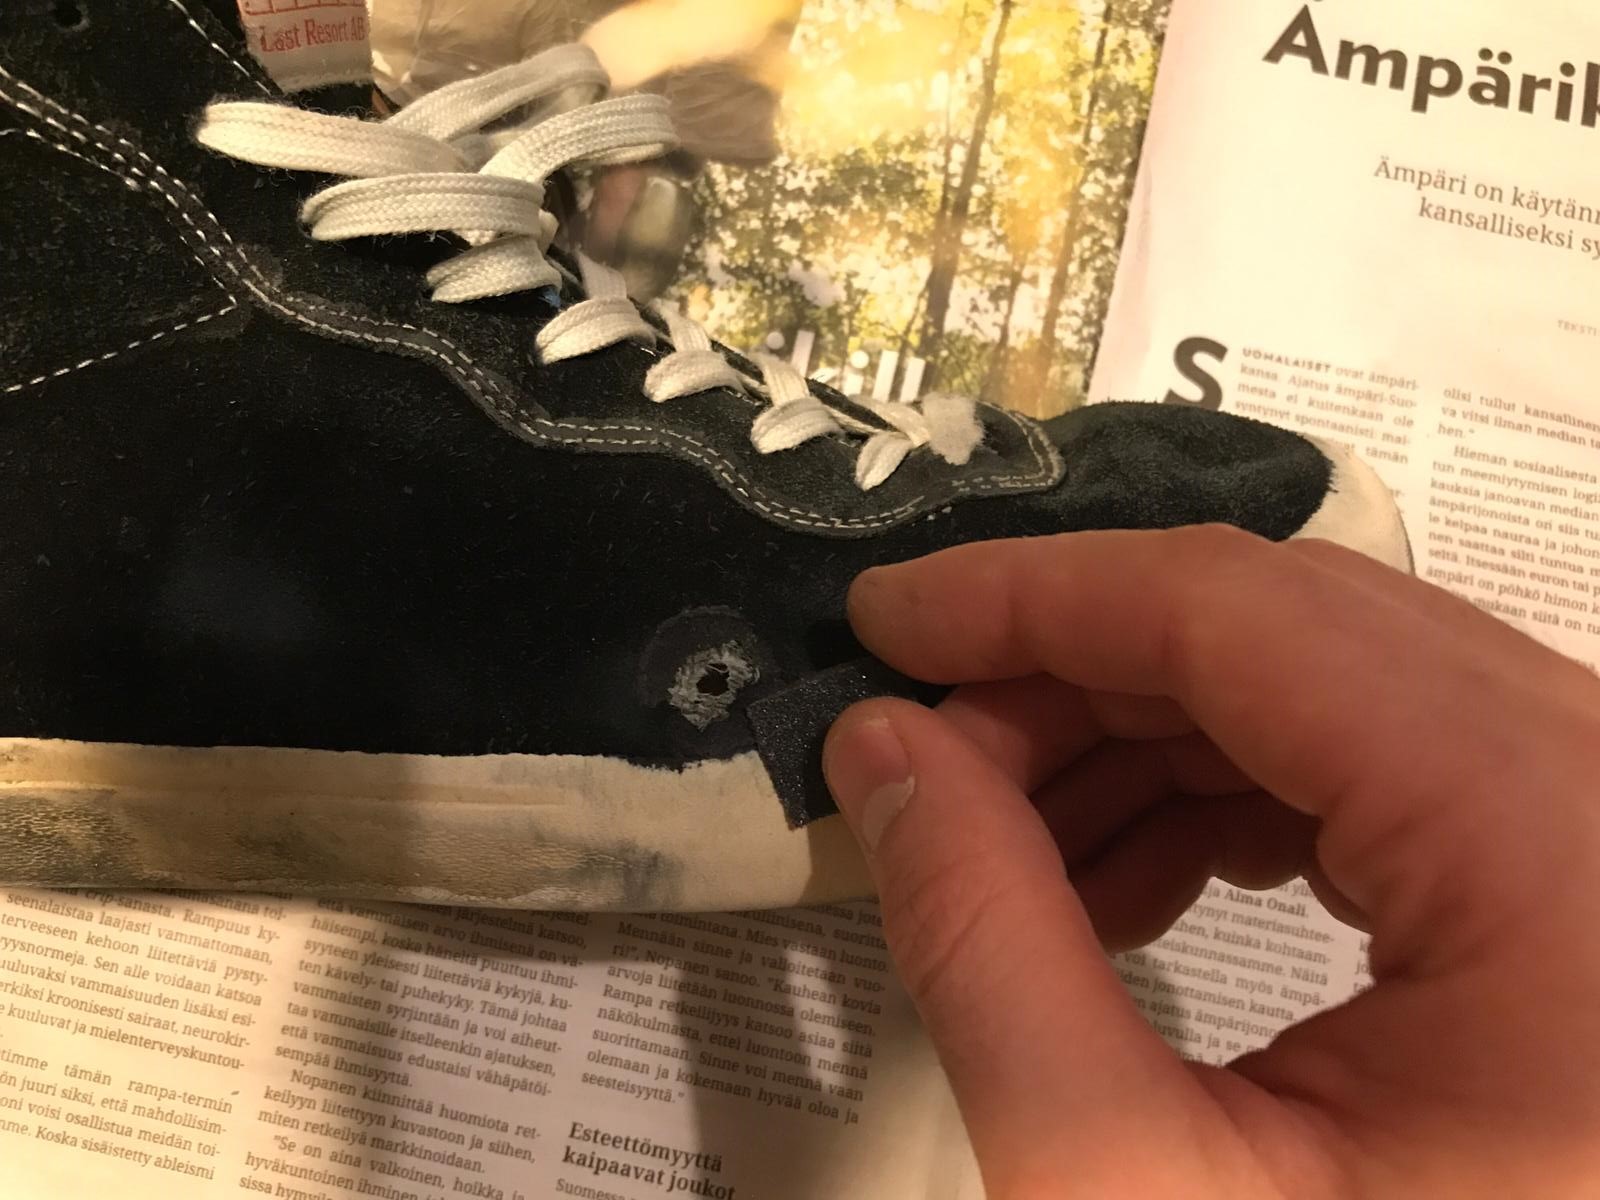
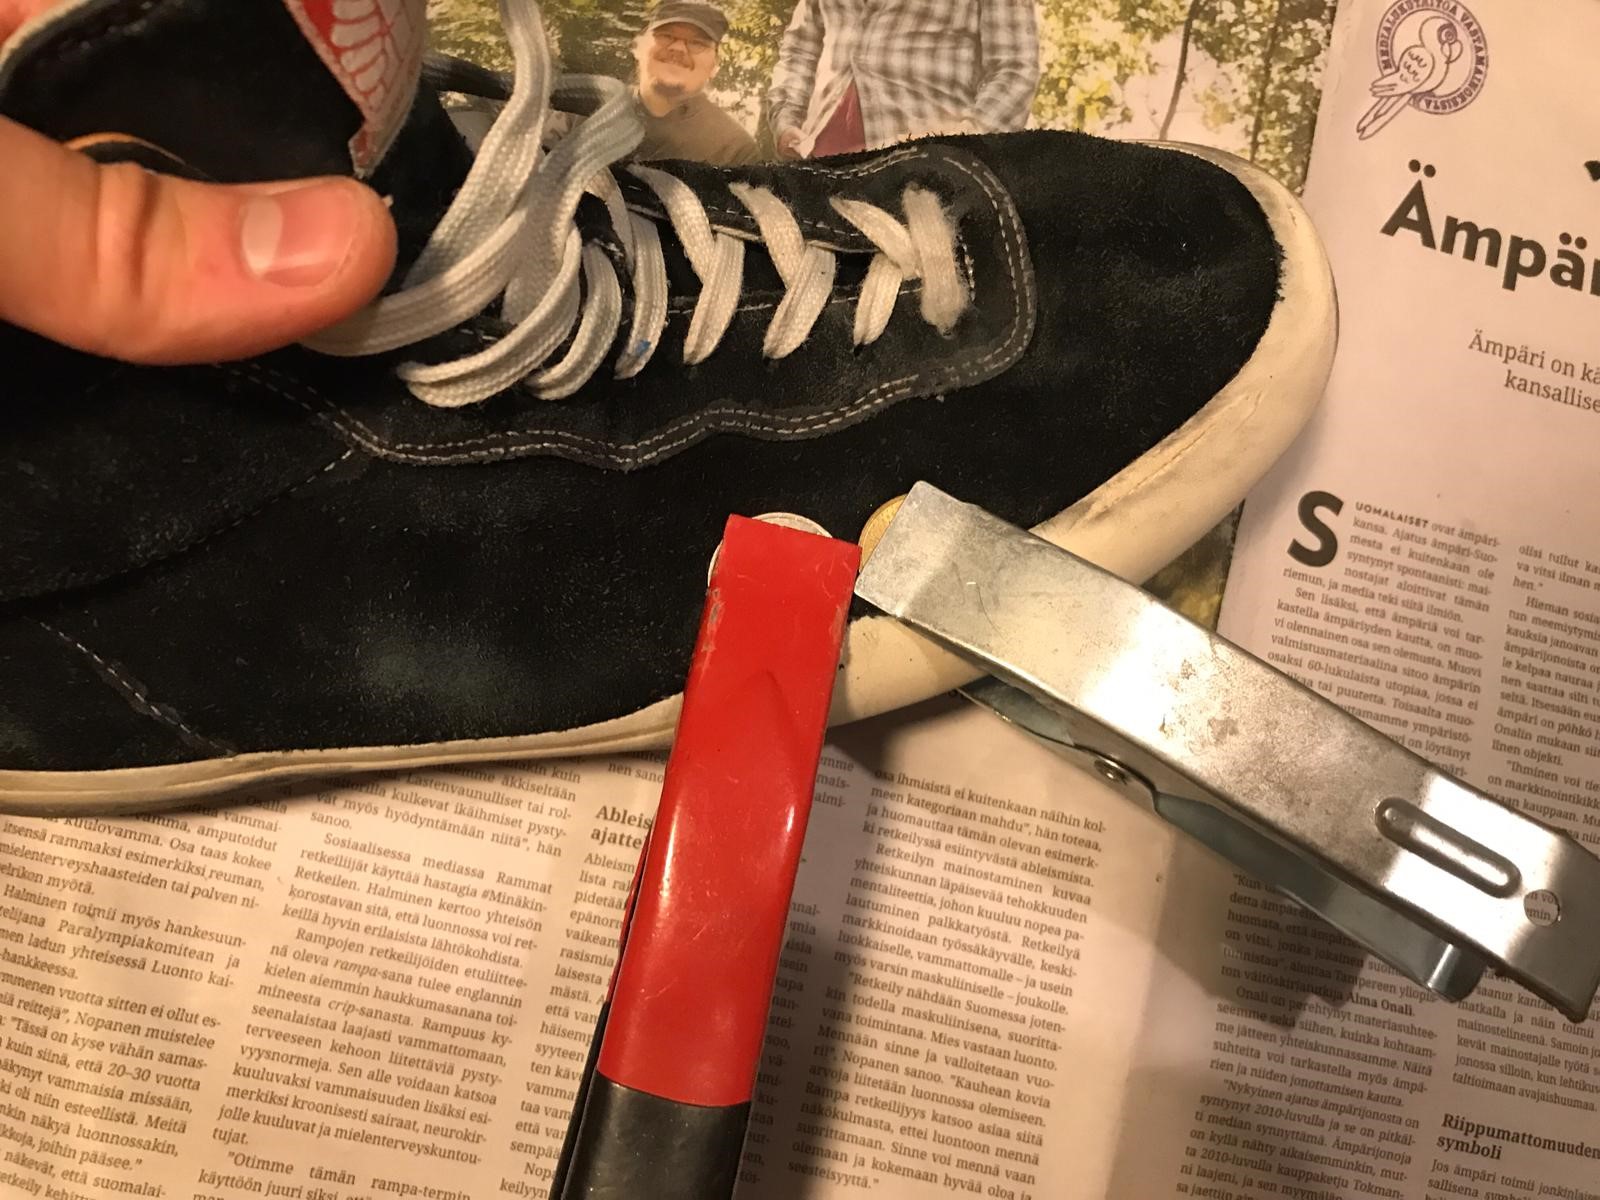
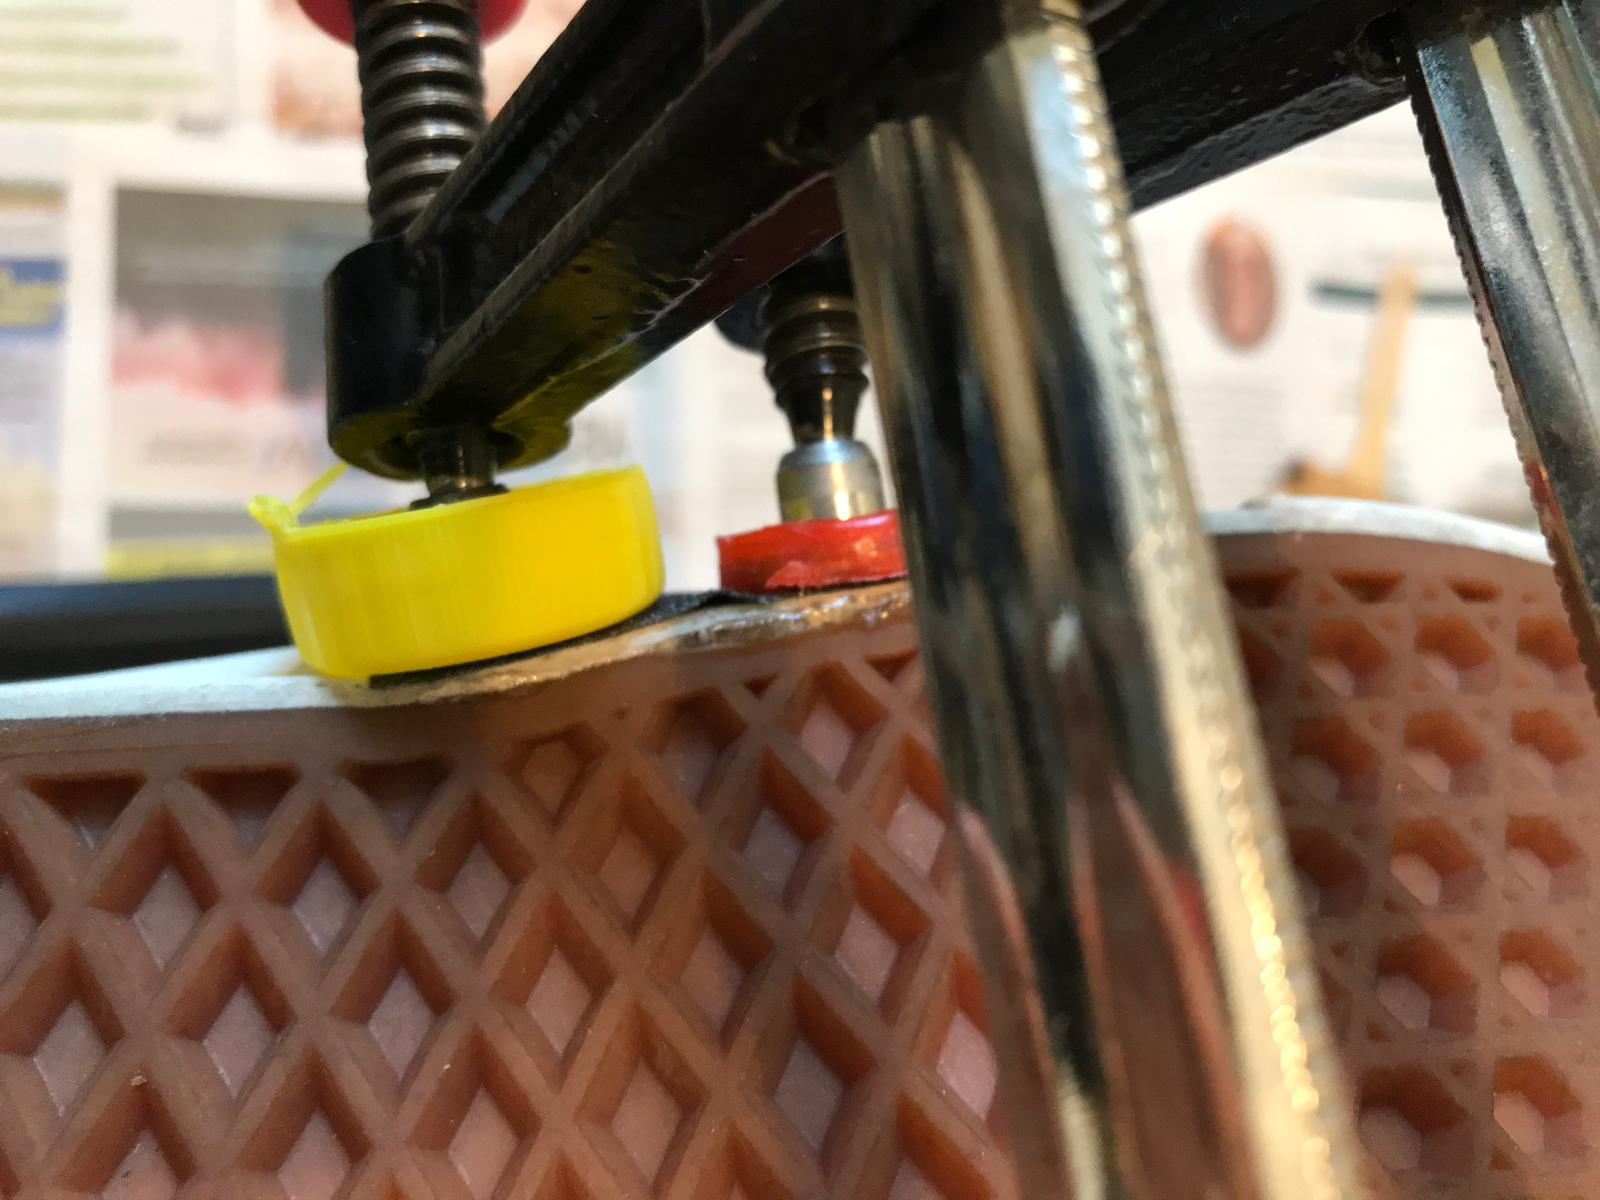
Then, take a wood slab and insert it into the shoe so that it forms a flat supporting surface for the hole.
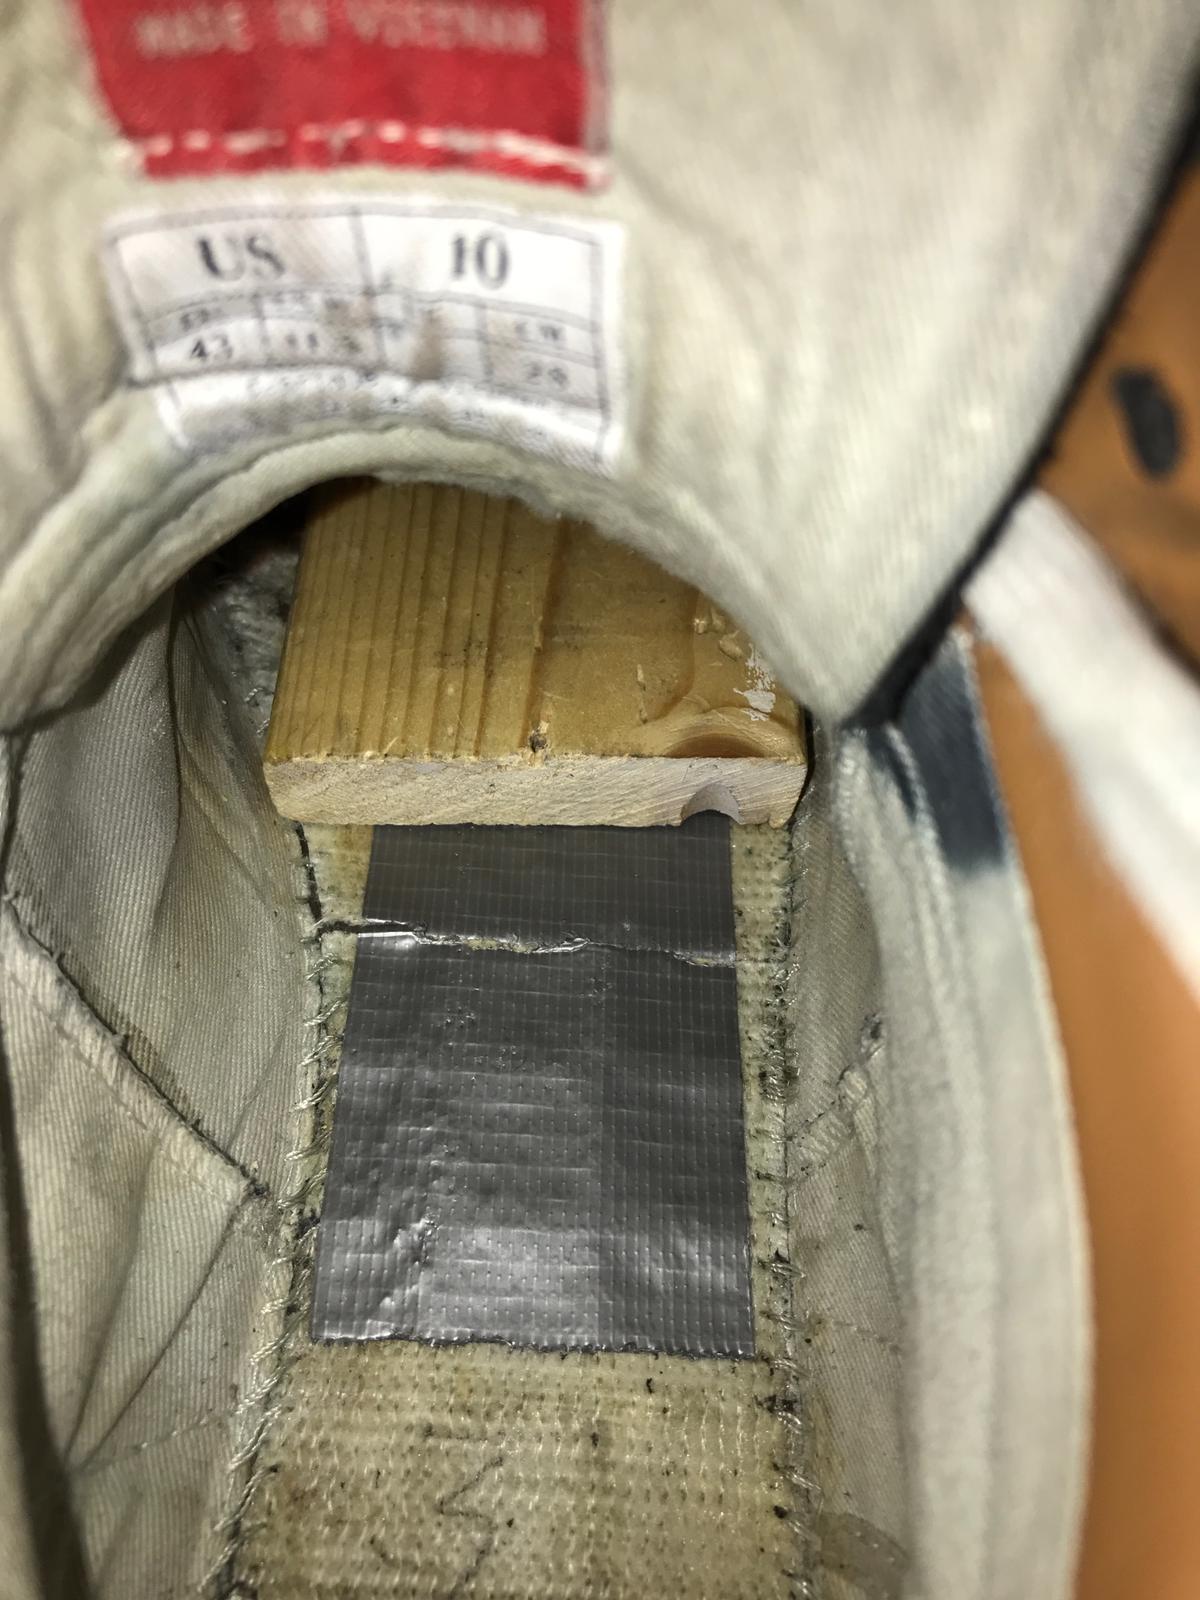
After that, apply contact glue to the patch and stick the patch on to the hole.
Finally, clamp the wood slab on top of the patch with a few spring clamps. Wait for 24 hours and it’s barely noticeable.
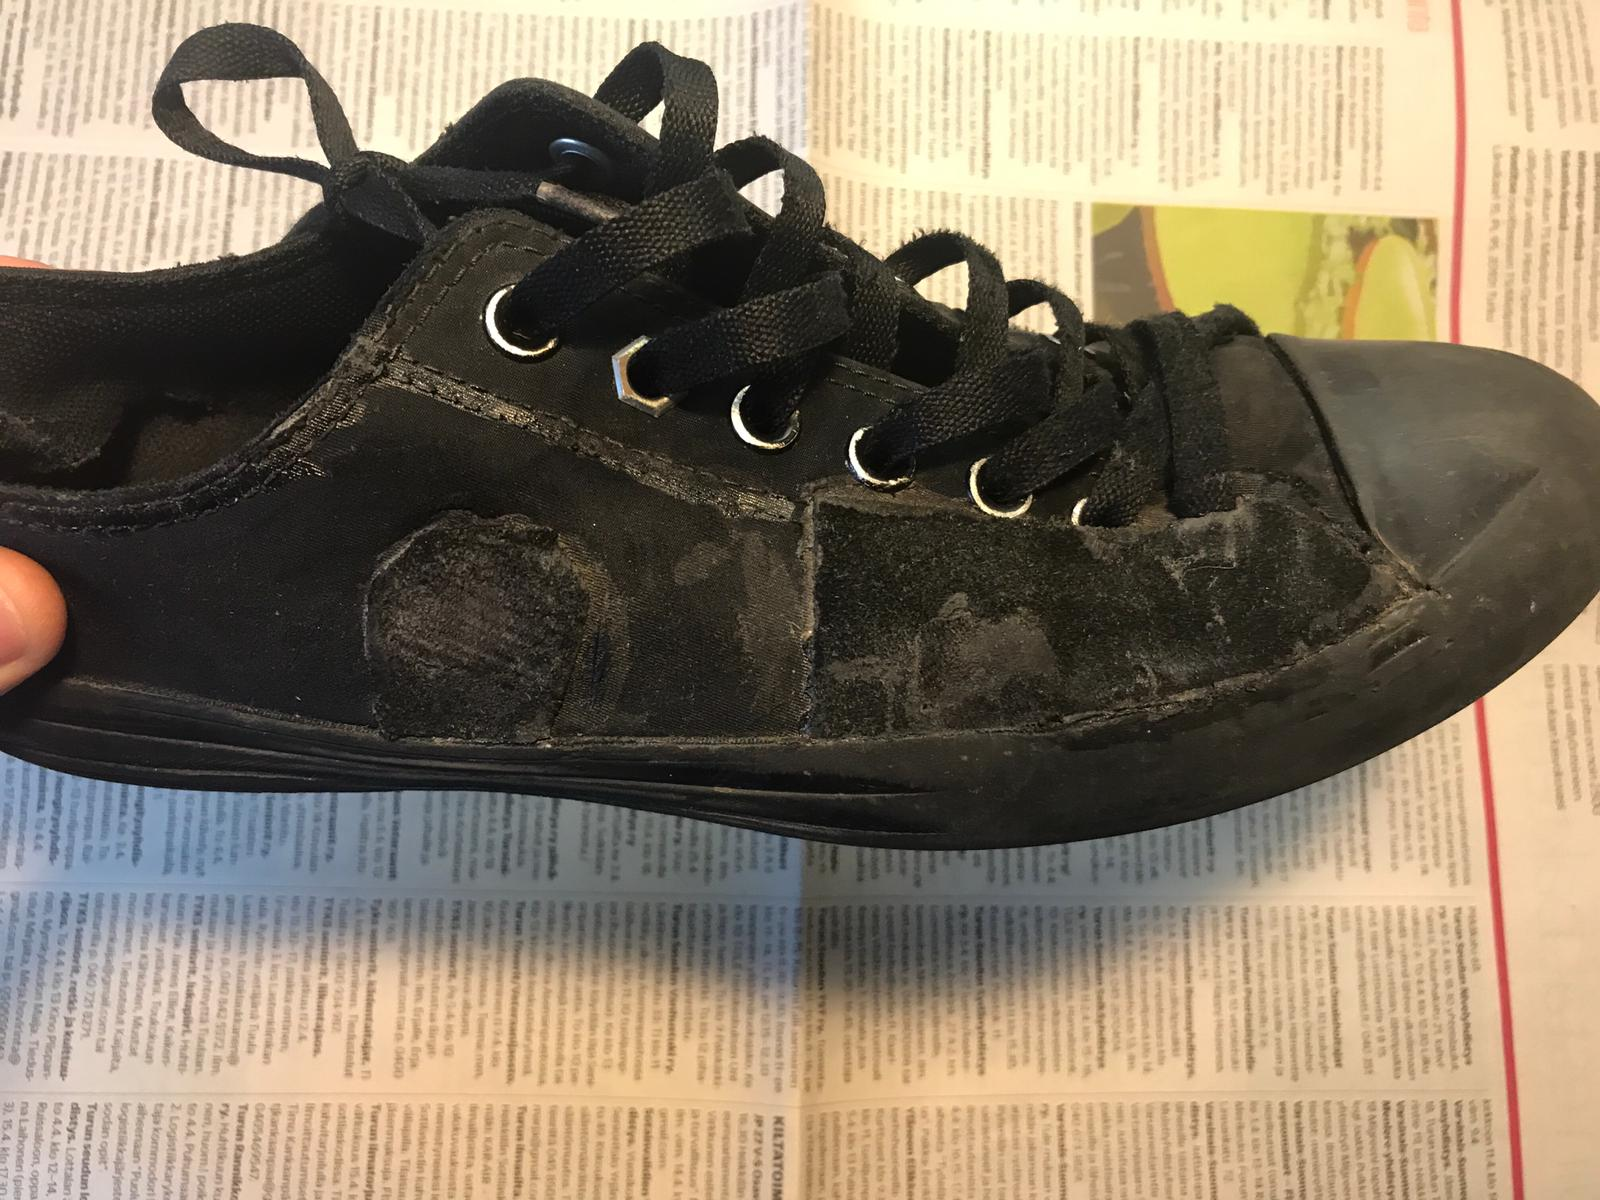
With this method, I was able to convert a canvas CTAS into a pretty long-lasting shoe. This is after 3 months of skating and it’s held up pretty well.
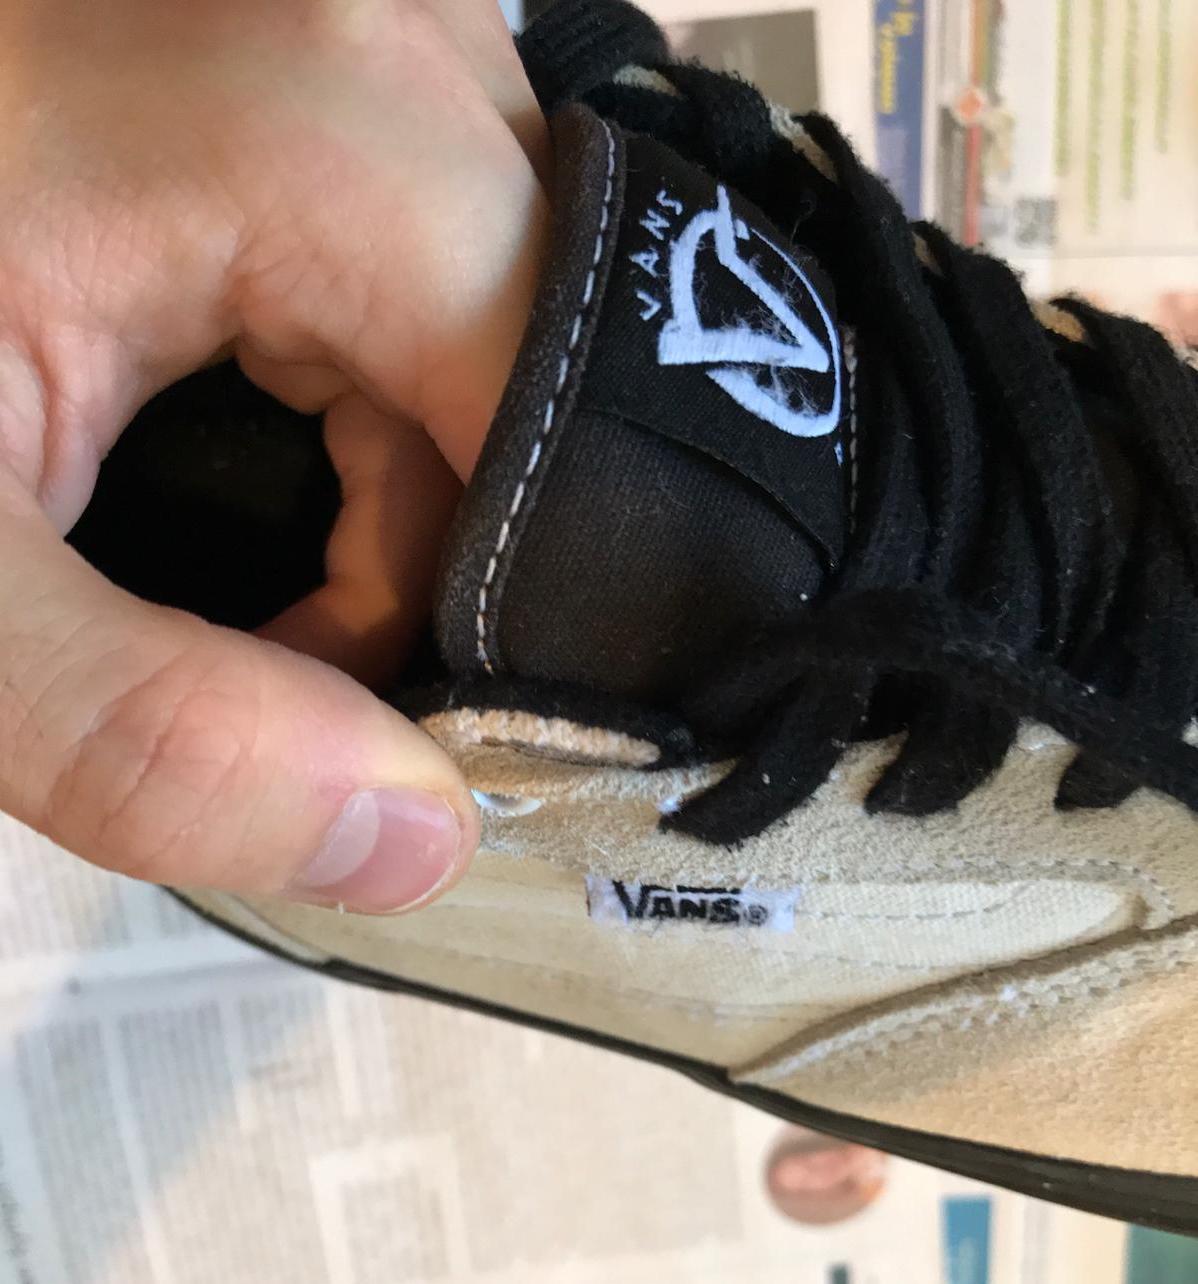
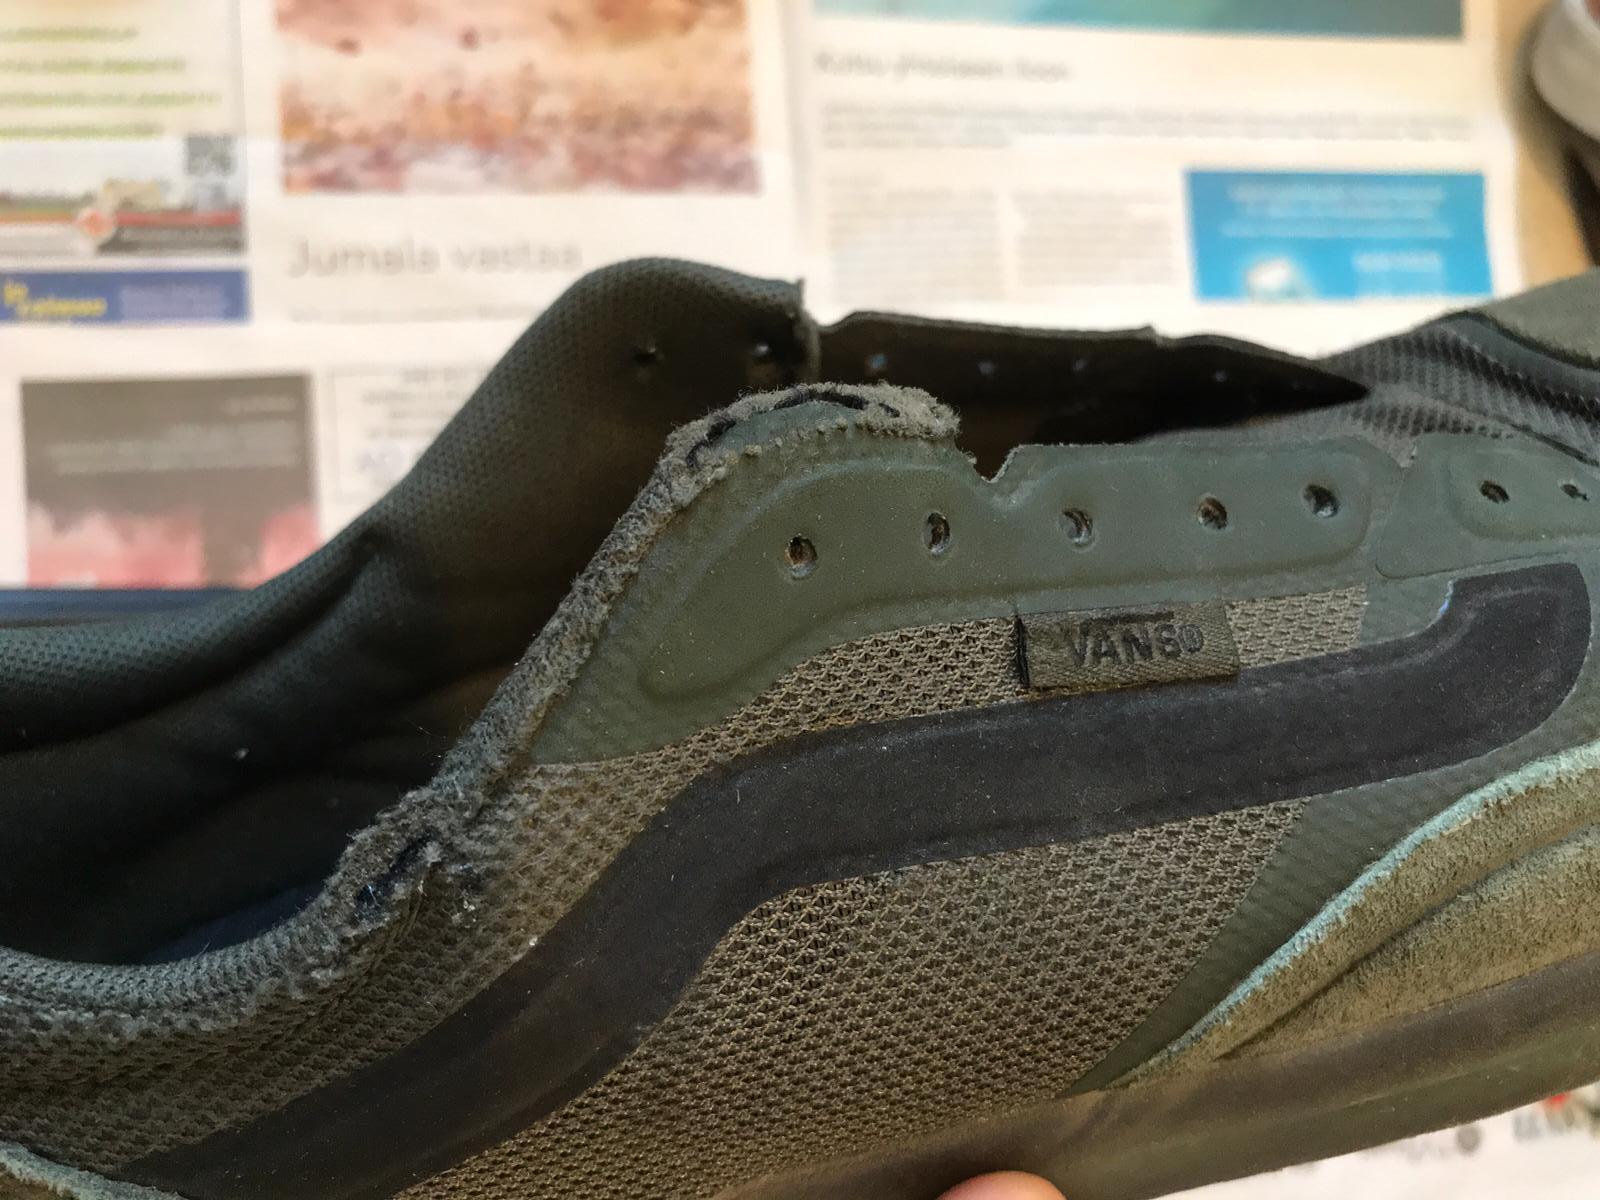
Fixing Sole Separation
The majority of vulcanized shoes' soles will become separated from the foxing tapes, this is no exception with skate shoes. Almost all of the shoes that I skated had this issue, especially with Vans and Converse. Again, for minor separations, superglue is your best friend here. However, for larger detachments, you might need something more heavy duty, like contact glue.
For Minor Separations:
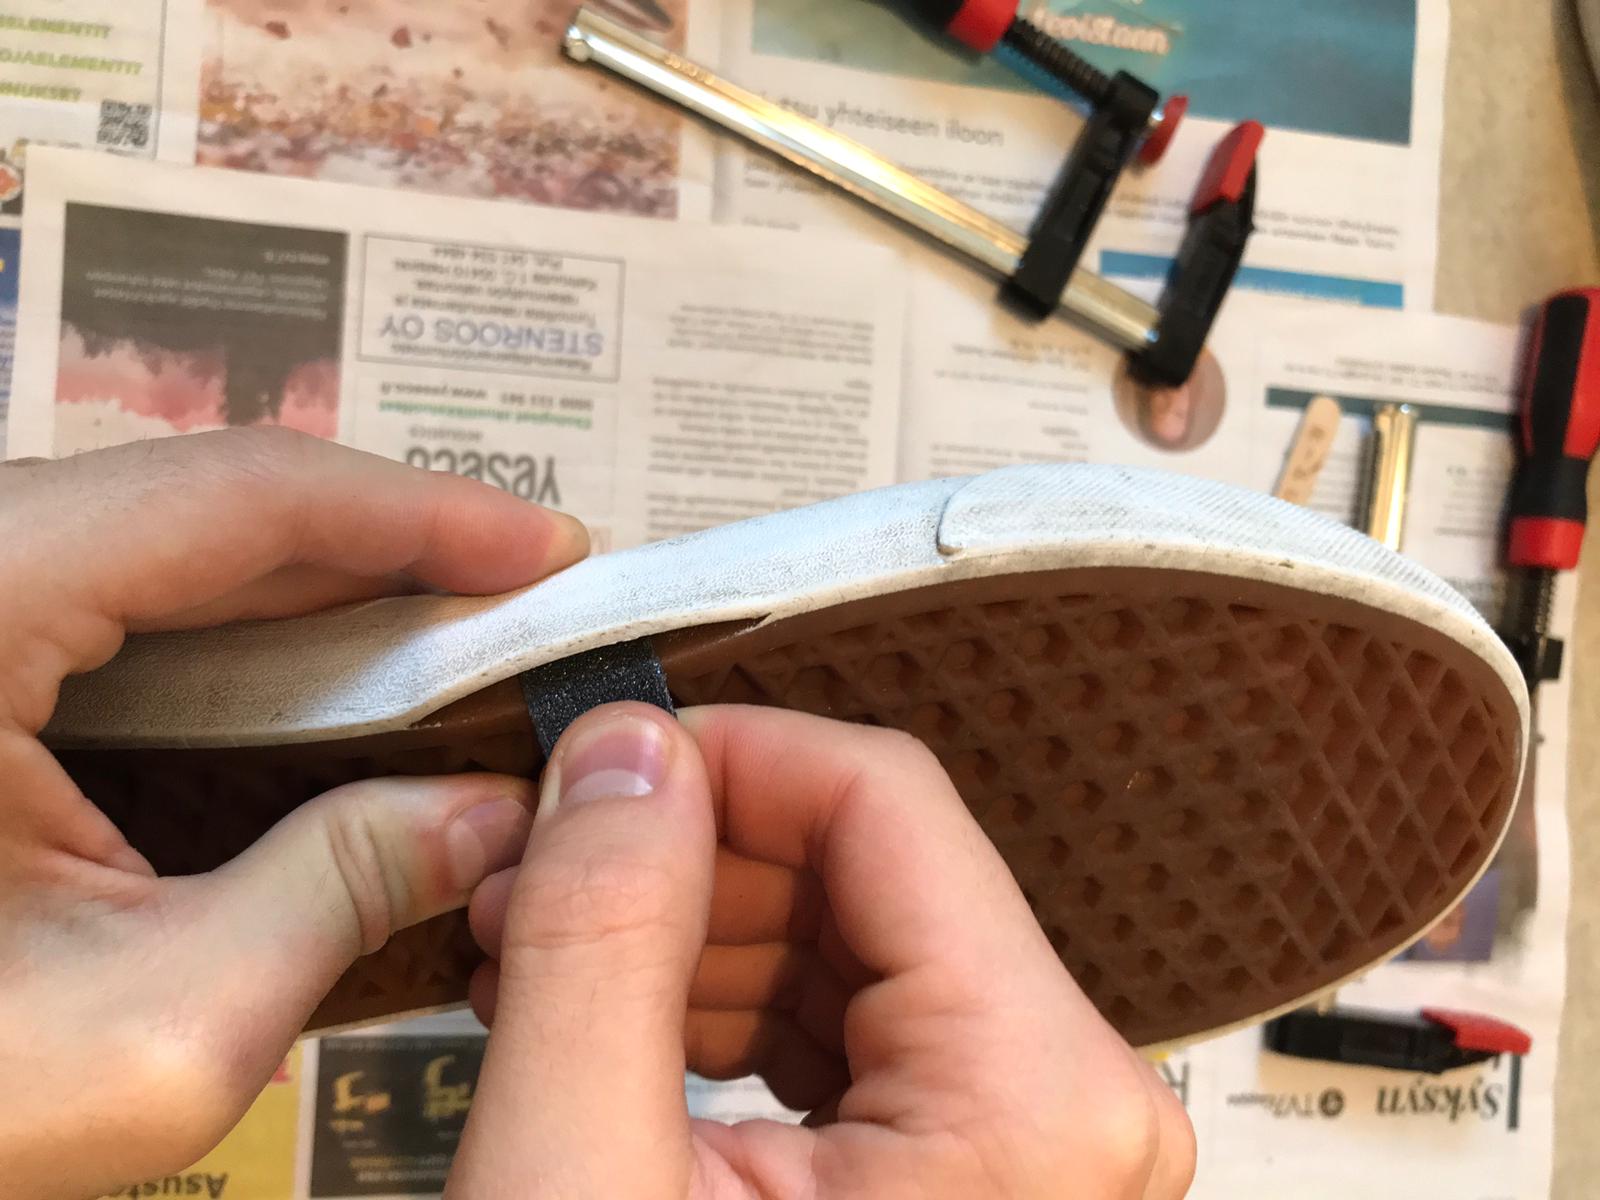
Take a piece of sandpaper or griptape and roughen up the split, this helps the rubber to have a stronger bond with each other.
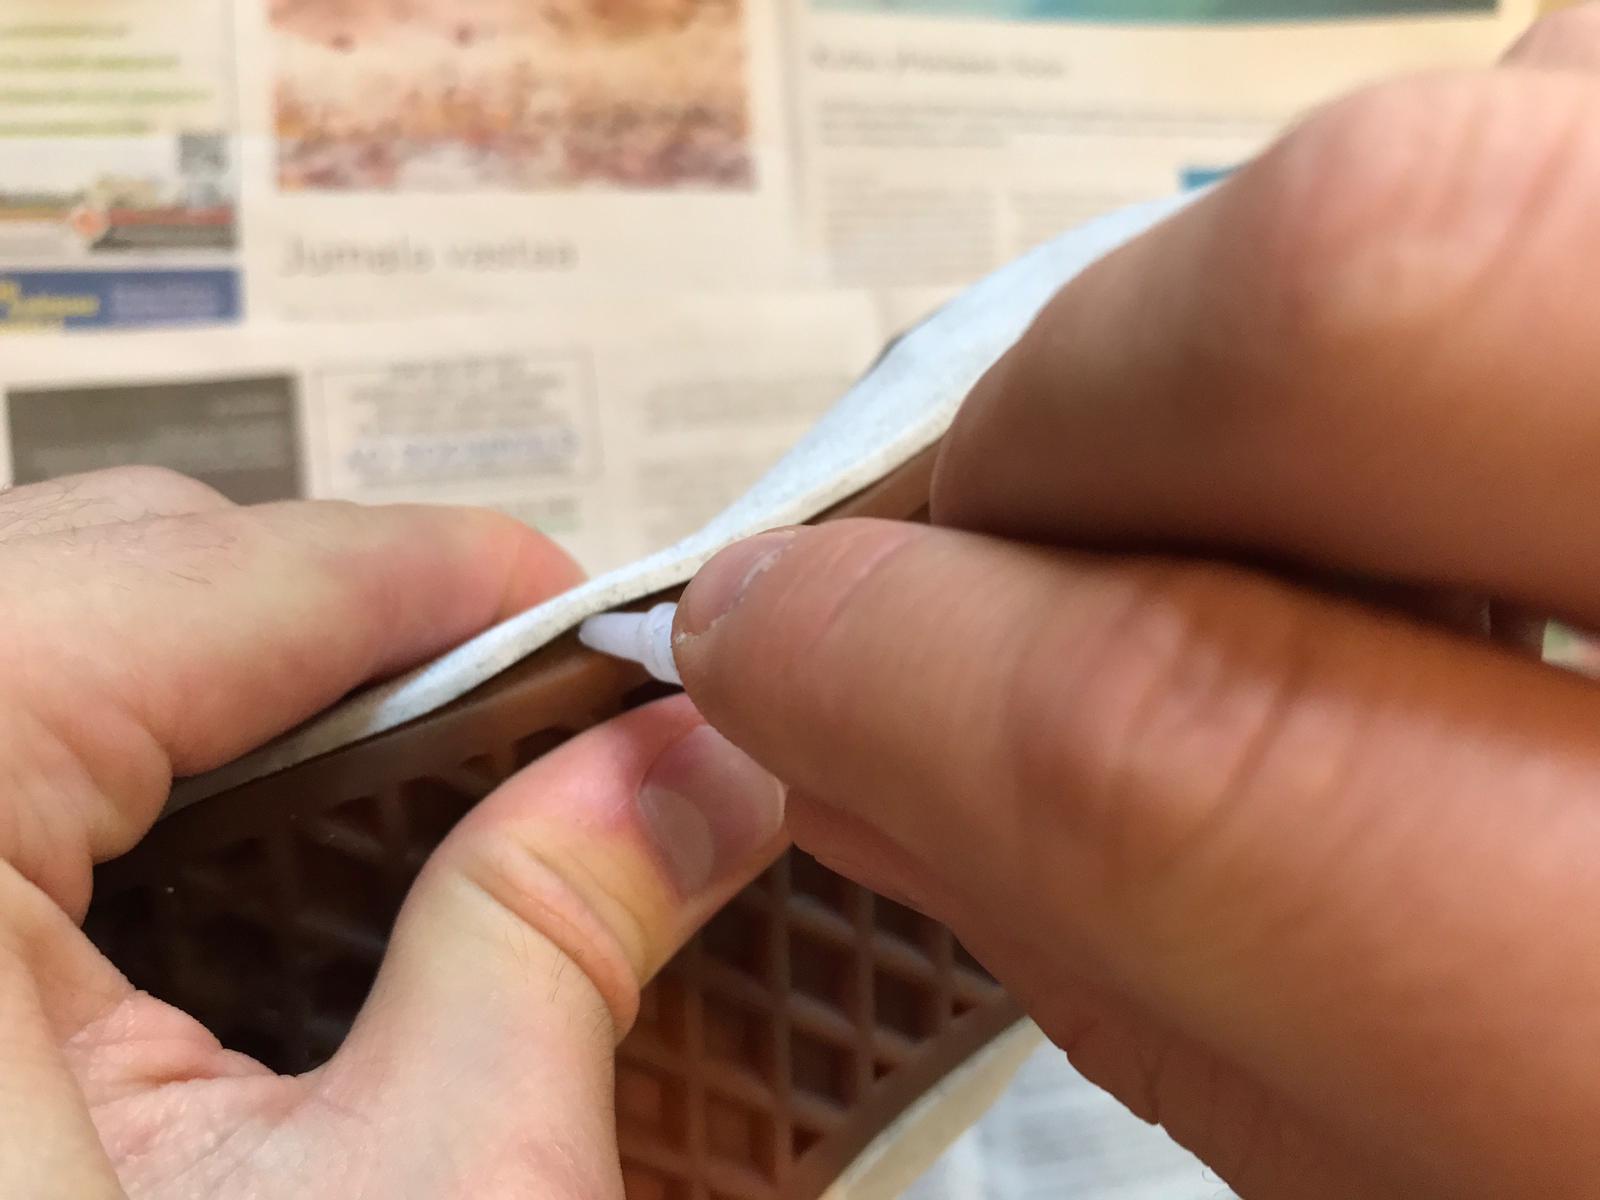
Then, apply an even amount of superglue into the gap.
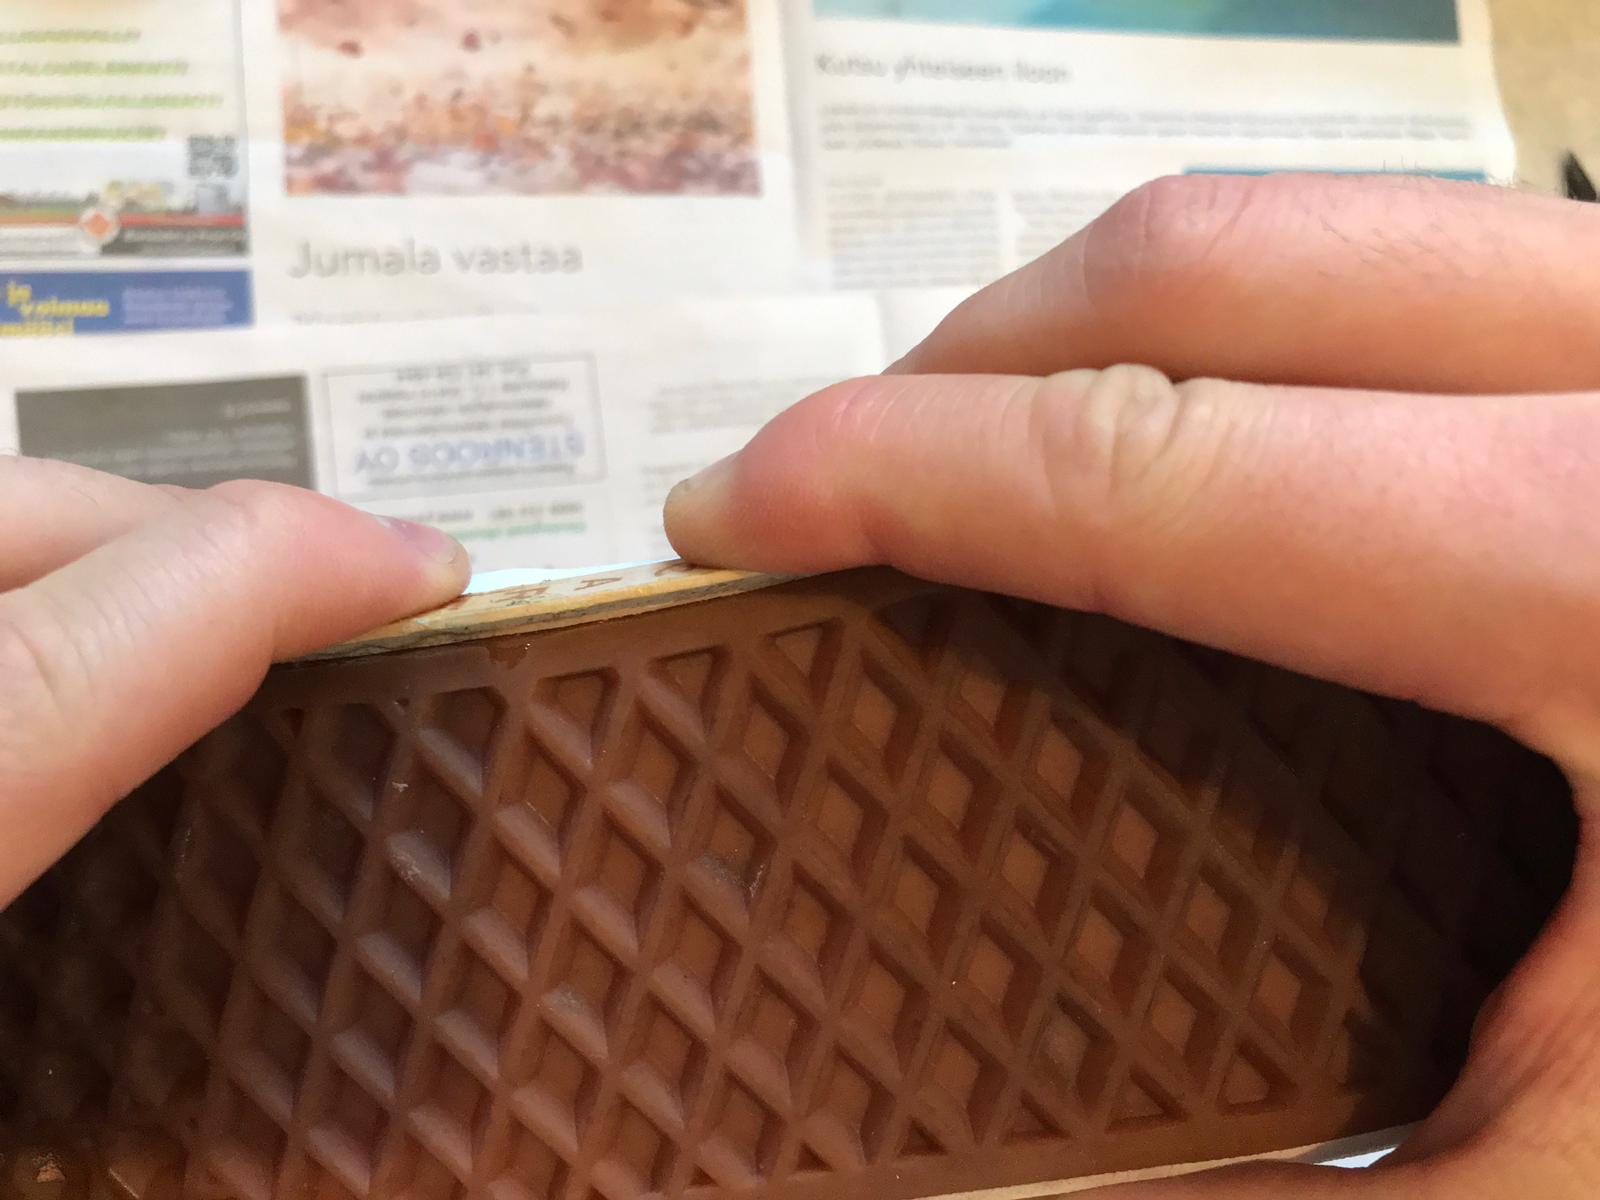
Finally, hold and press firmly on to the sides of the shoe to ensure proper bondage. Maintain pressure for about a minute and it's ready to be skated.
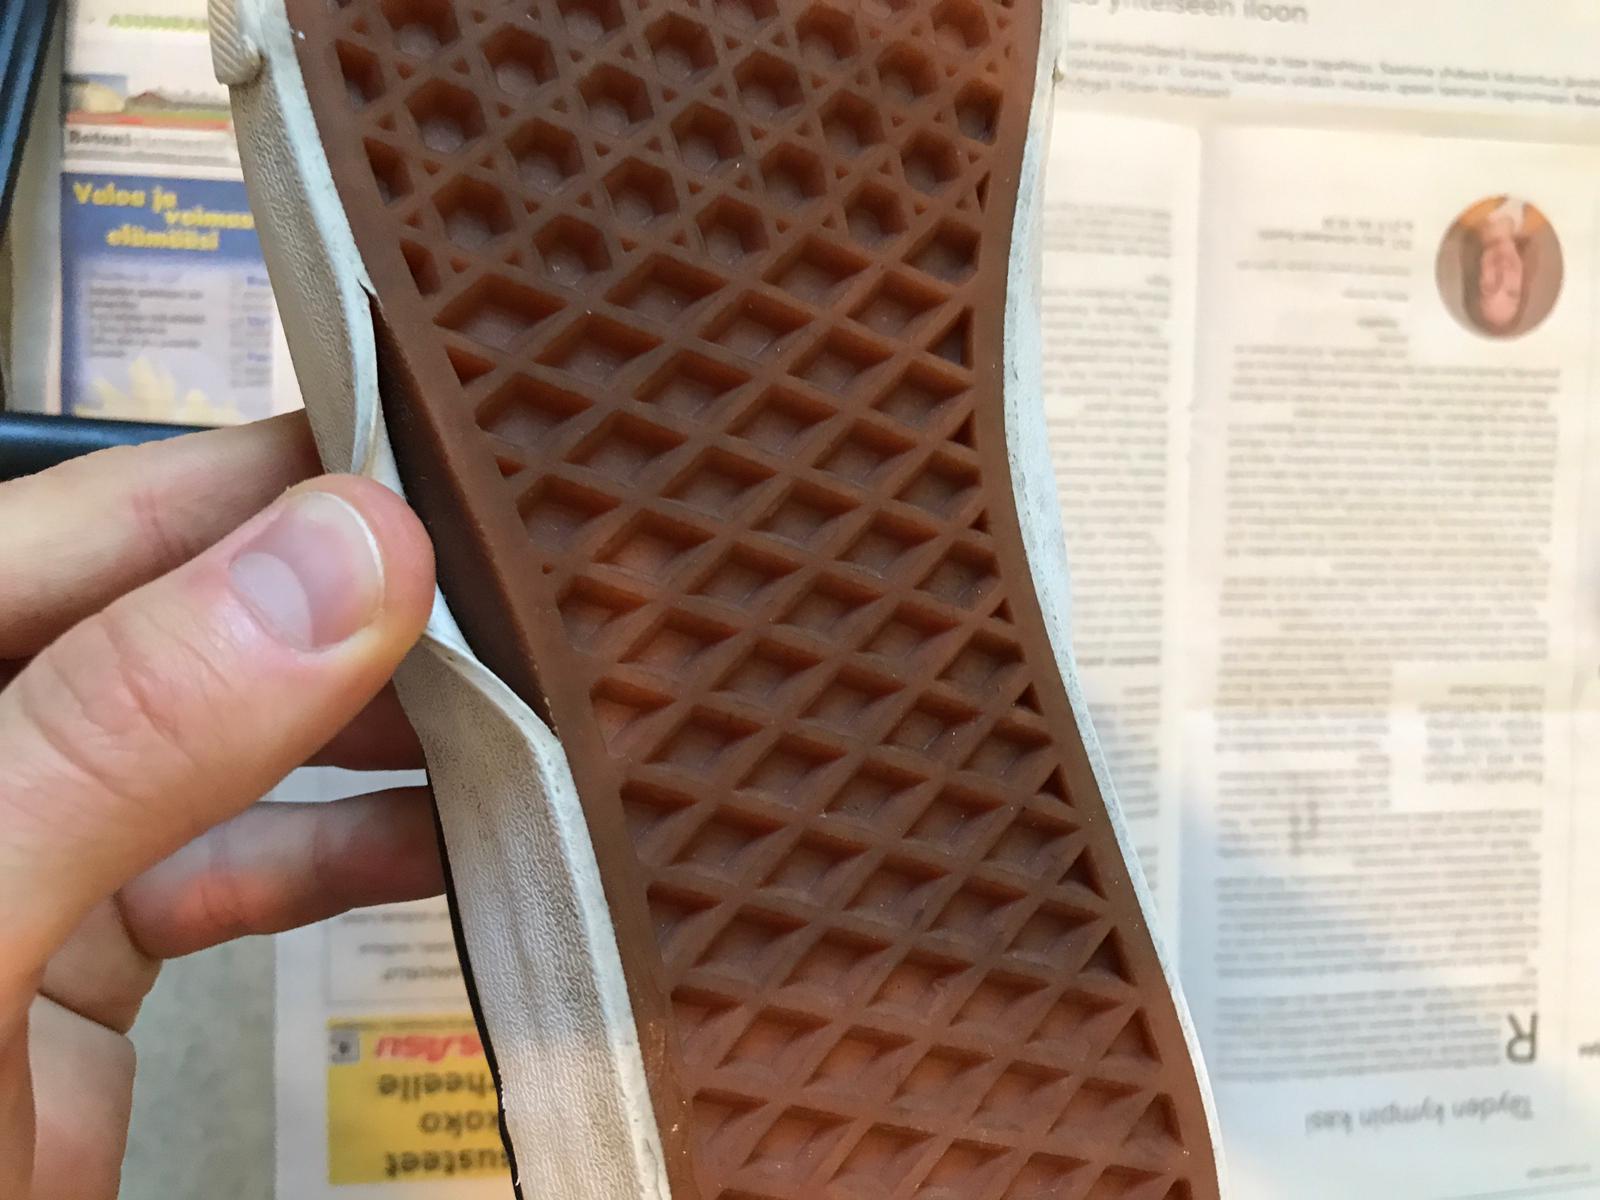
Superglue isn't as flexible as contact glue and it's prone to cracking, so you have to keep re-gluing the split as the shoes wear through.
For Major Separations:
Again, sand down the separated area. But this time cut a small piece of griptape that's the same length as the split and stick it right on the foxing tape right besides it. This prevents the F-clamps from slipping out.
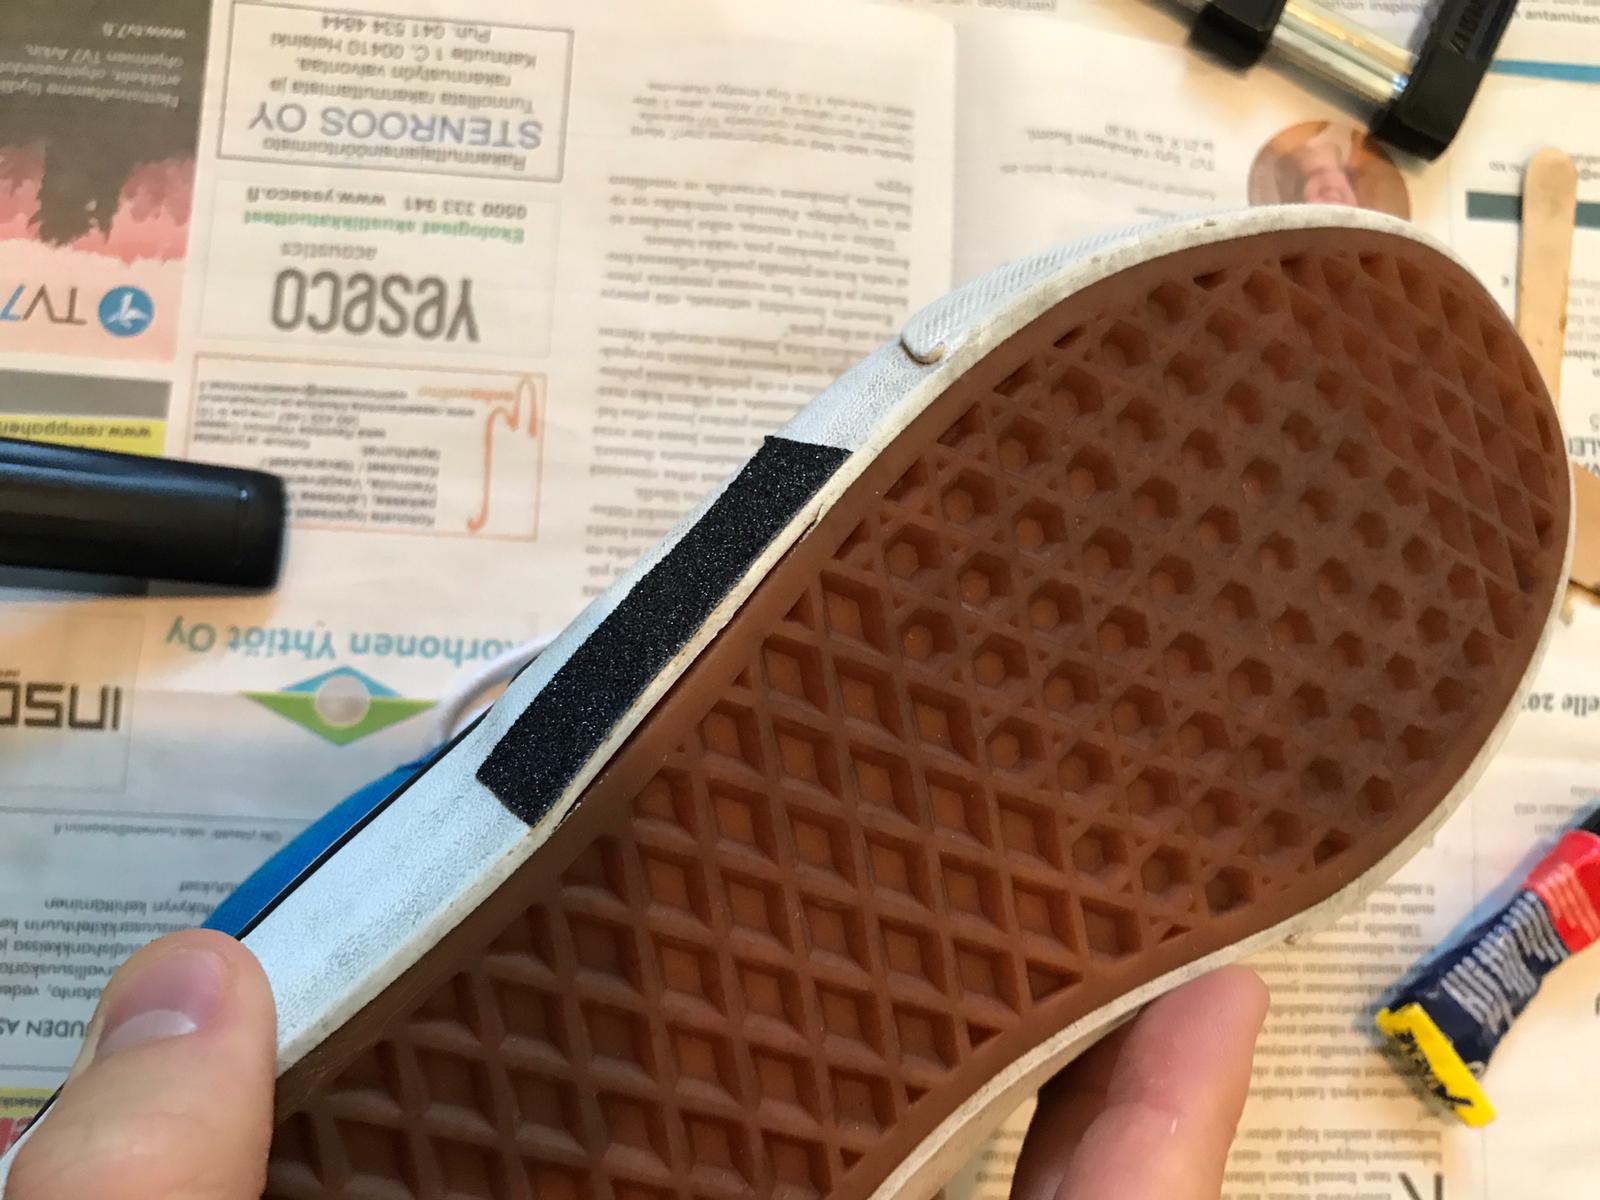
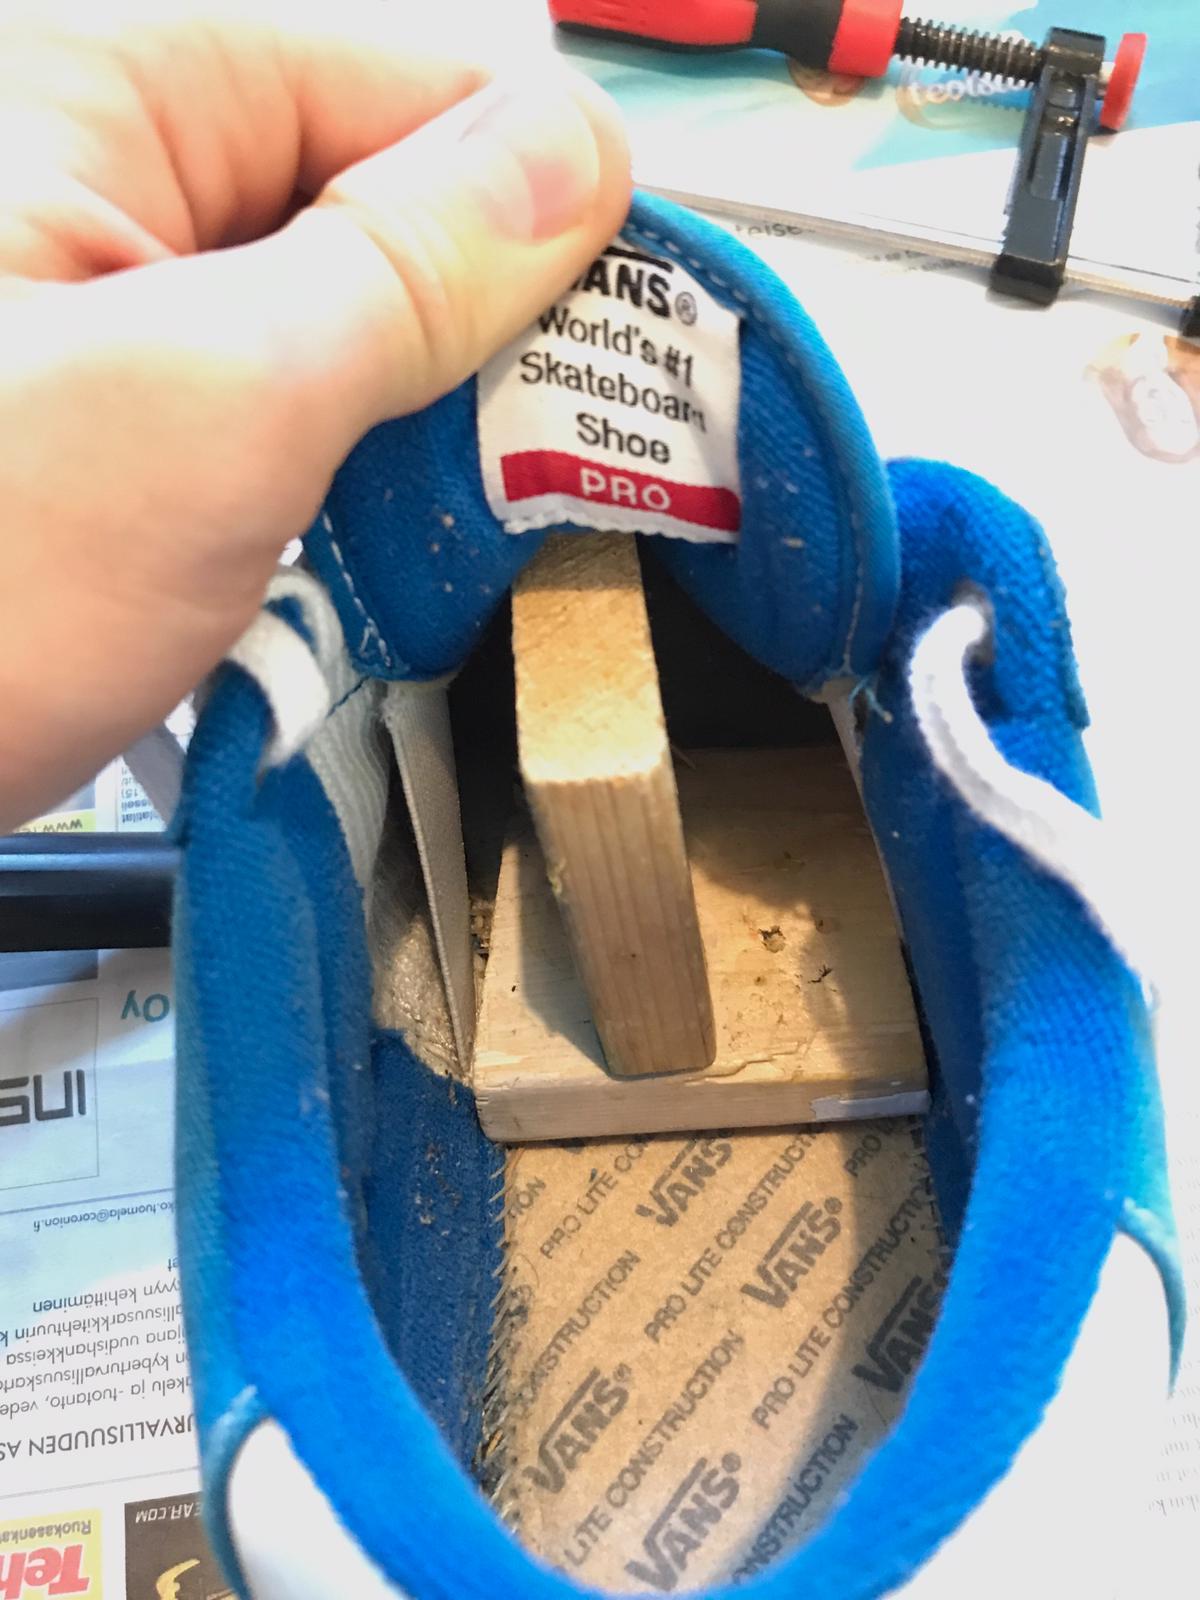
Insert supports to the inside of shoes. This allows the F-clamps to stay put when tightening. I'm using wooden slabs, but any other solid material works as well.
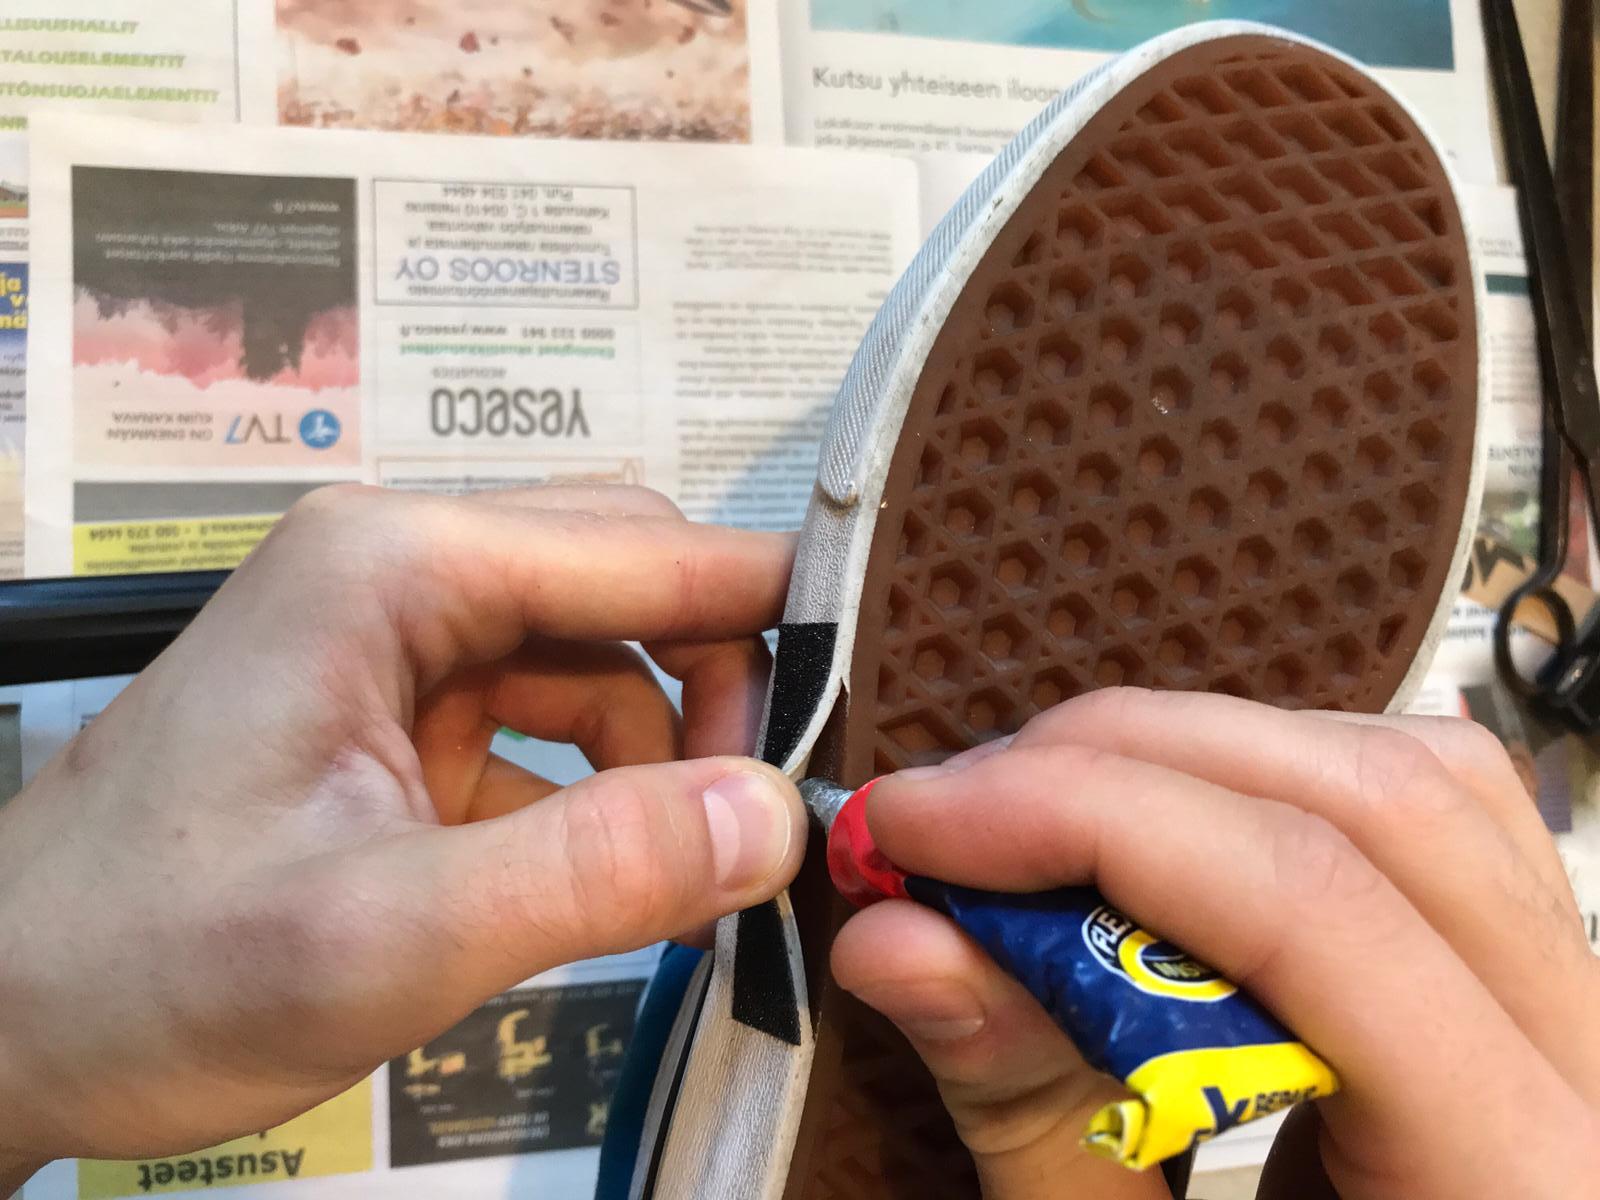
Apply contact glue in the split, make sure the glue is spread evenly.
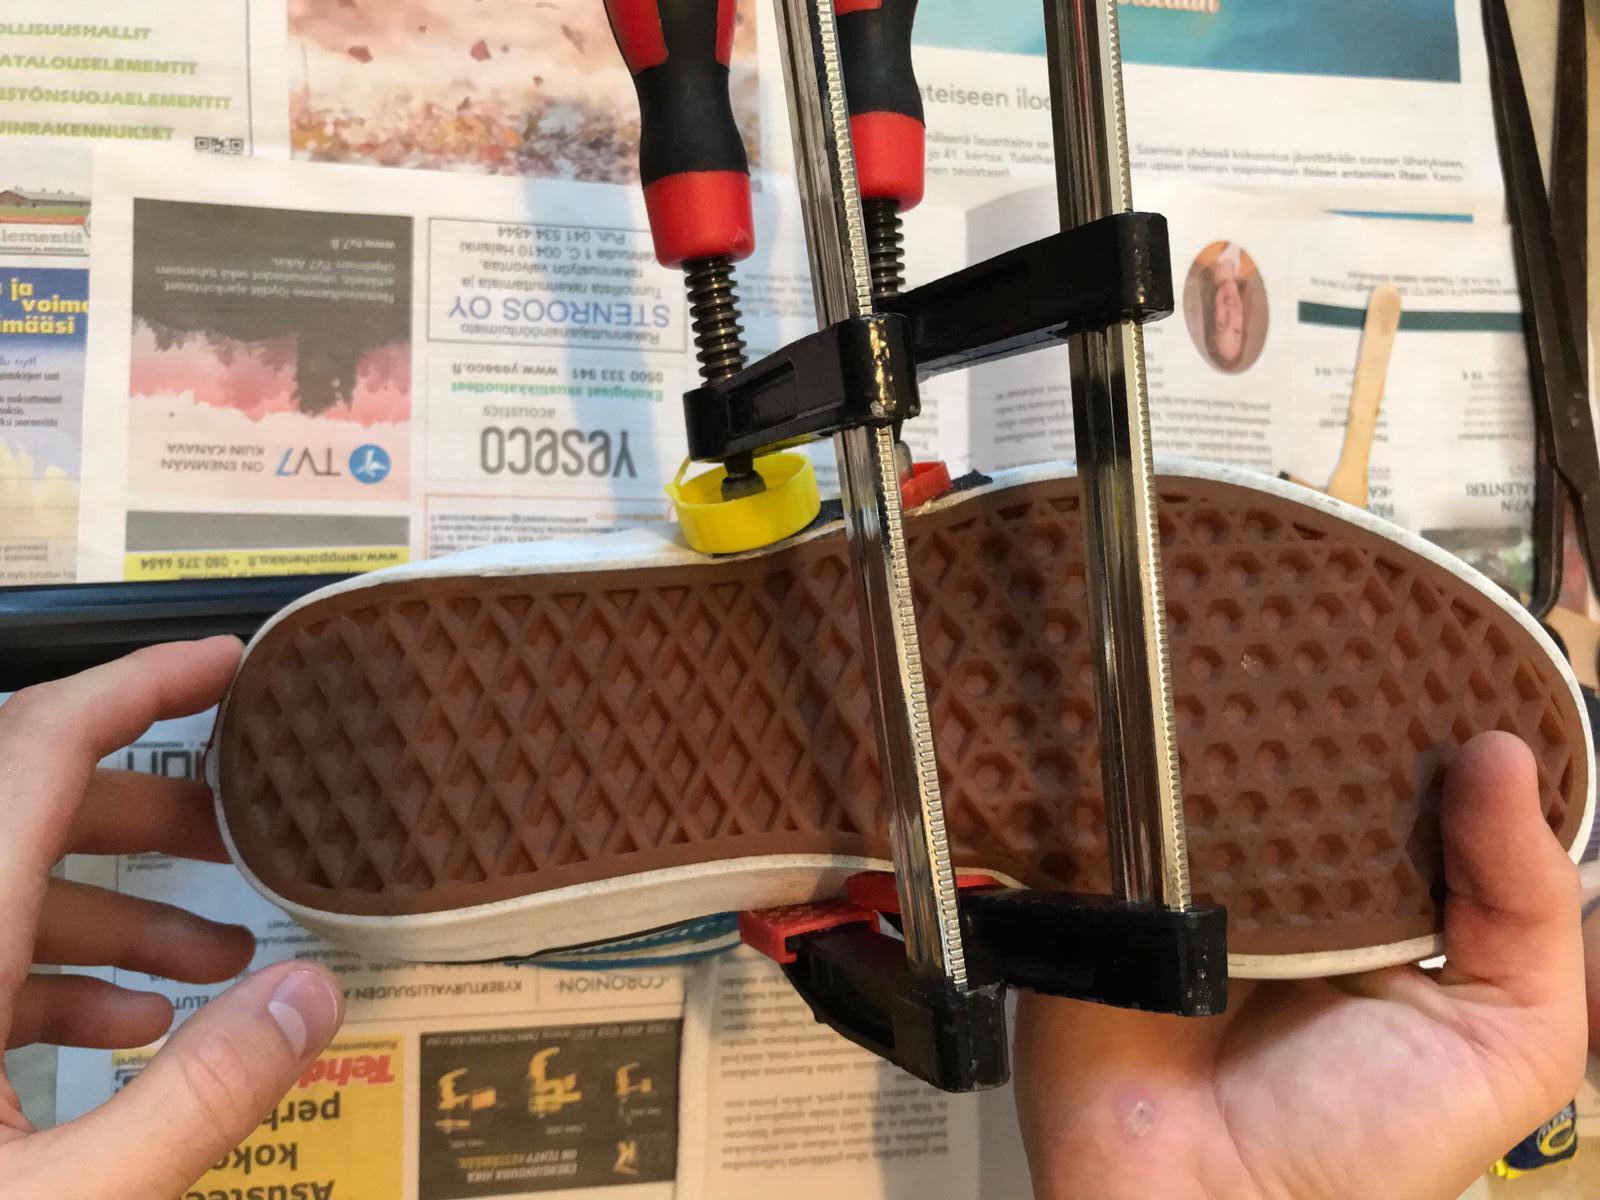
Now comes the hard part, take the F-clamps and secure it to both sides of the shoe. It may take a few attempts to get the clamps to hold on to the shoe. Once the clamps are fixed, leave the glue to dry for at least 24 hours.
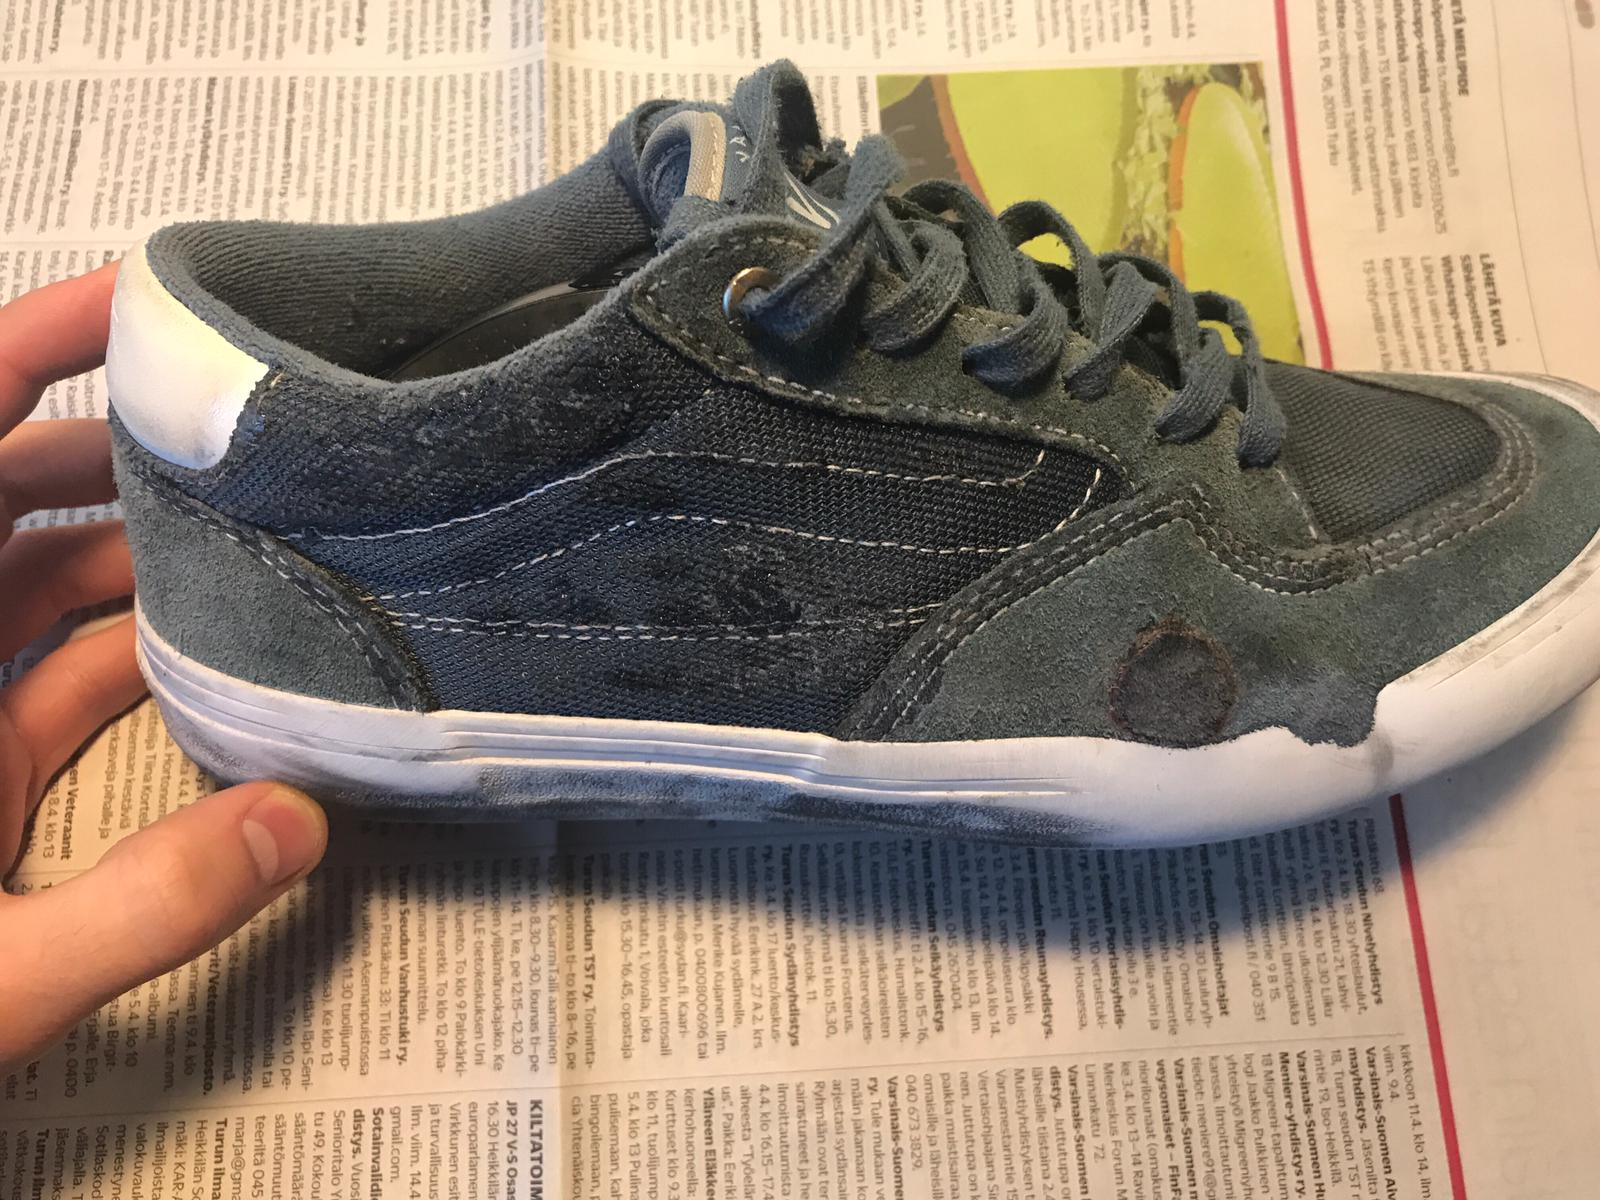
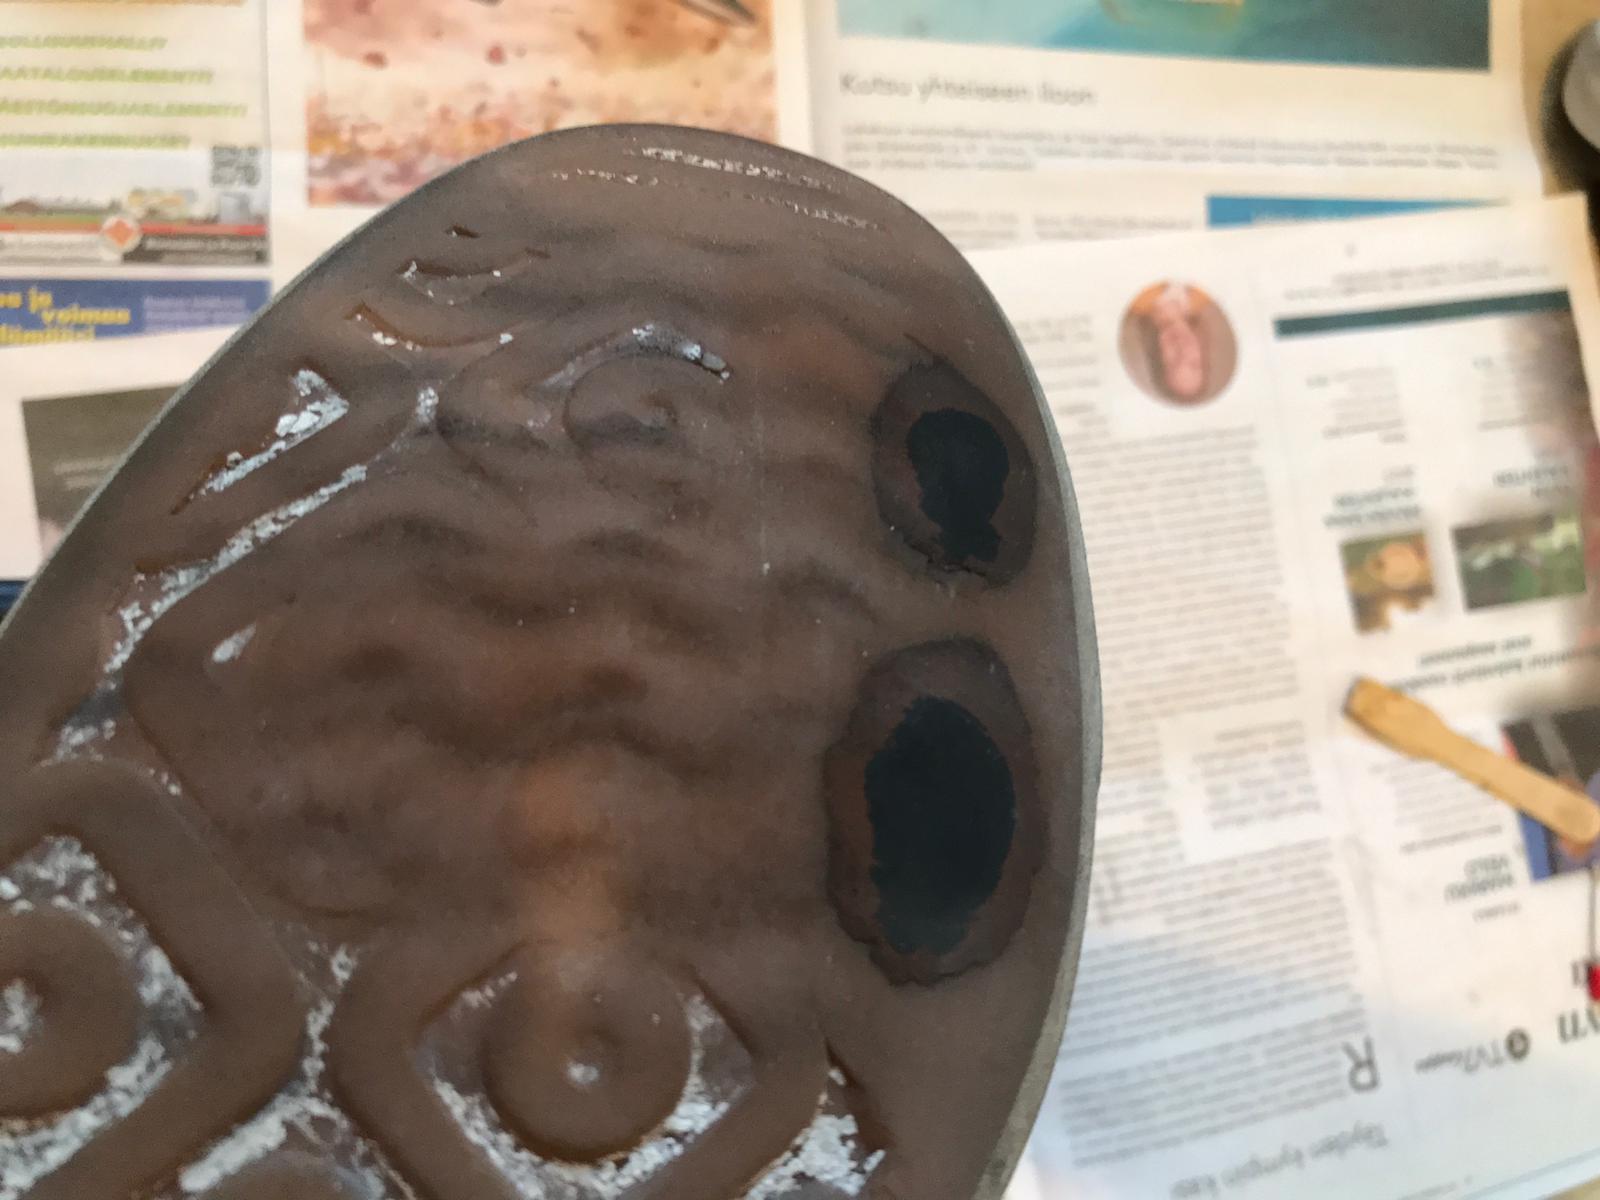
Fixing Worn Soles
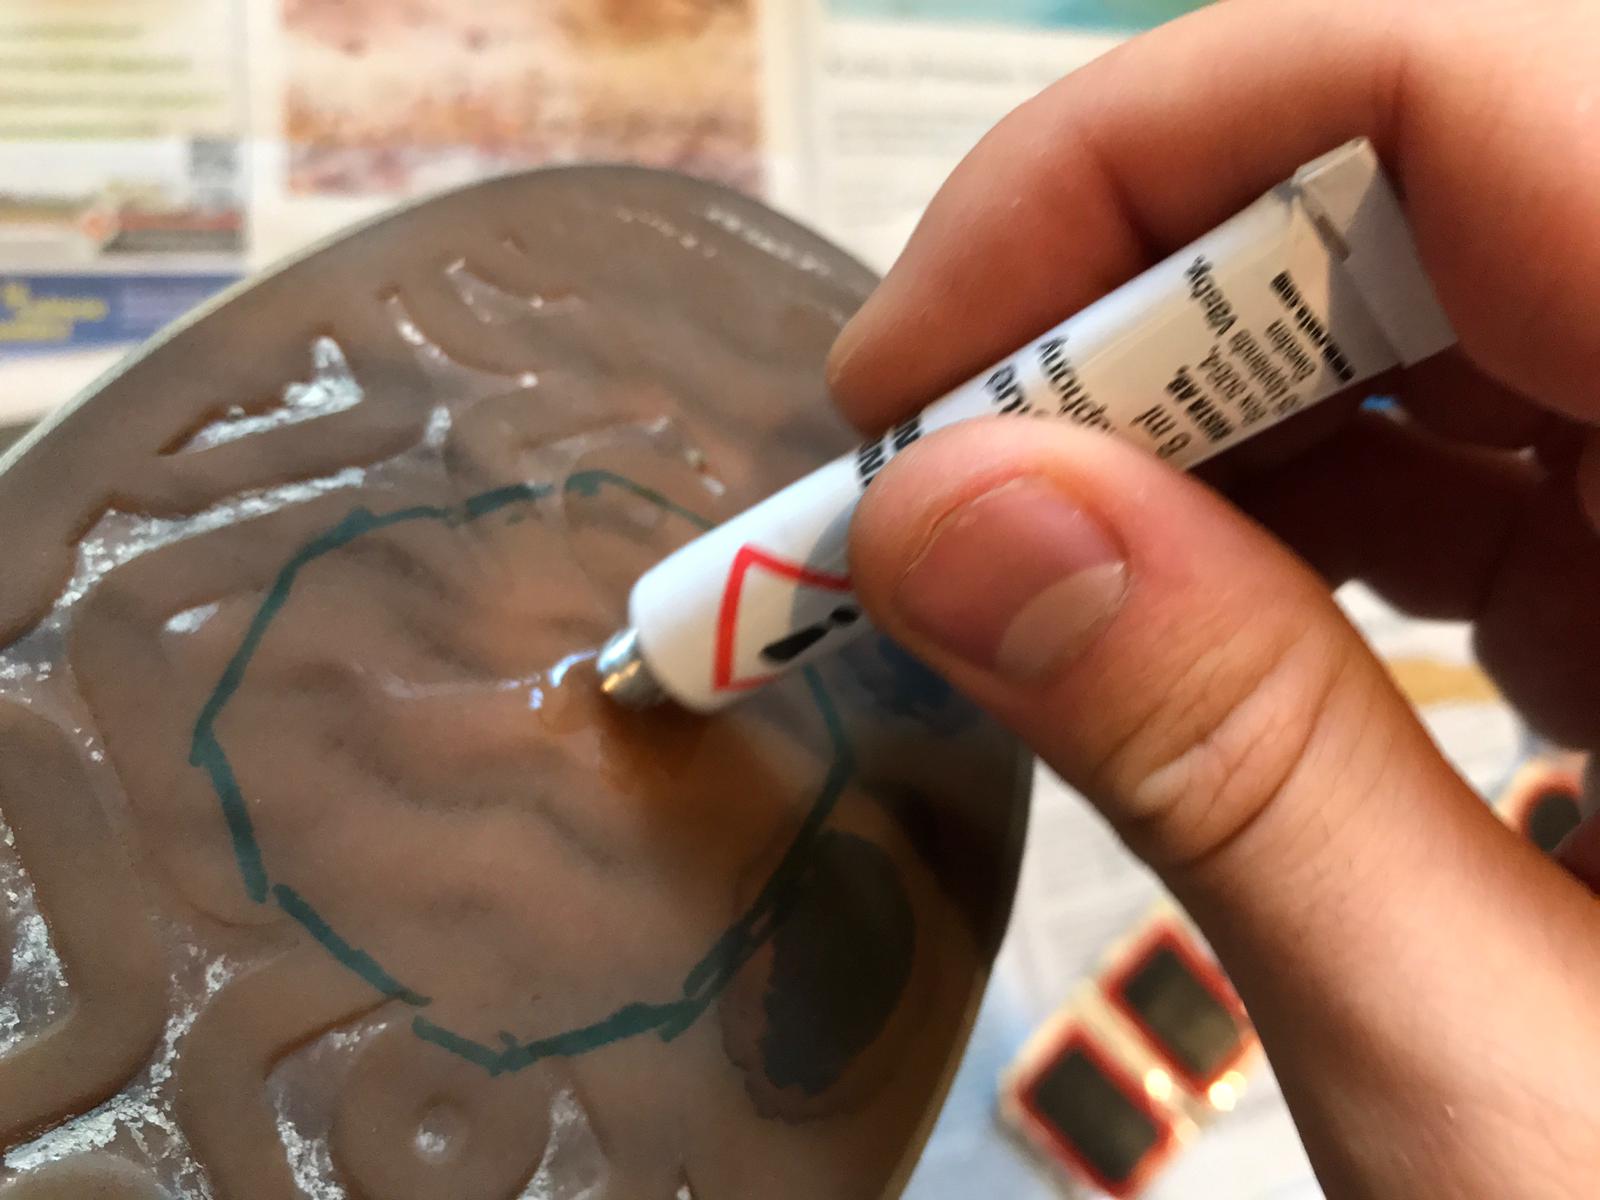
Usually, the sidewalls and panels of my skate shoes wear through before the soles are done. But for some older models of Vans and Last Resorts, the soles go bald way before the upper is destroyed. So to extend the life of your soles, you'll need a bike tire repair kit, superglue and a marker.
This method works best when the sole is flat, with no ridges. The rubber patches are holding up pretty well as seen below.
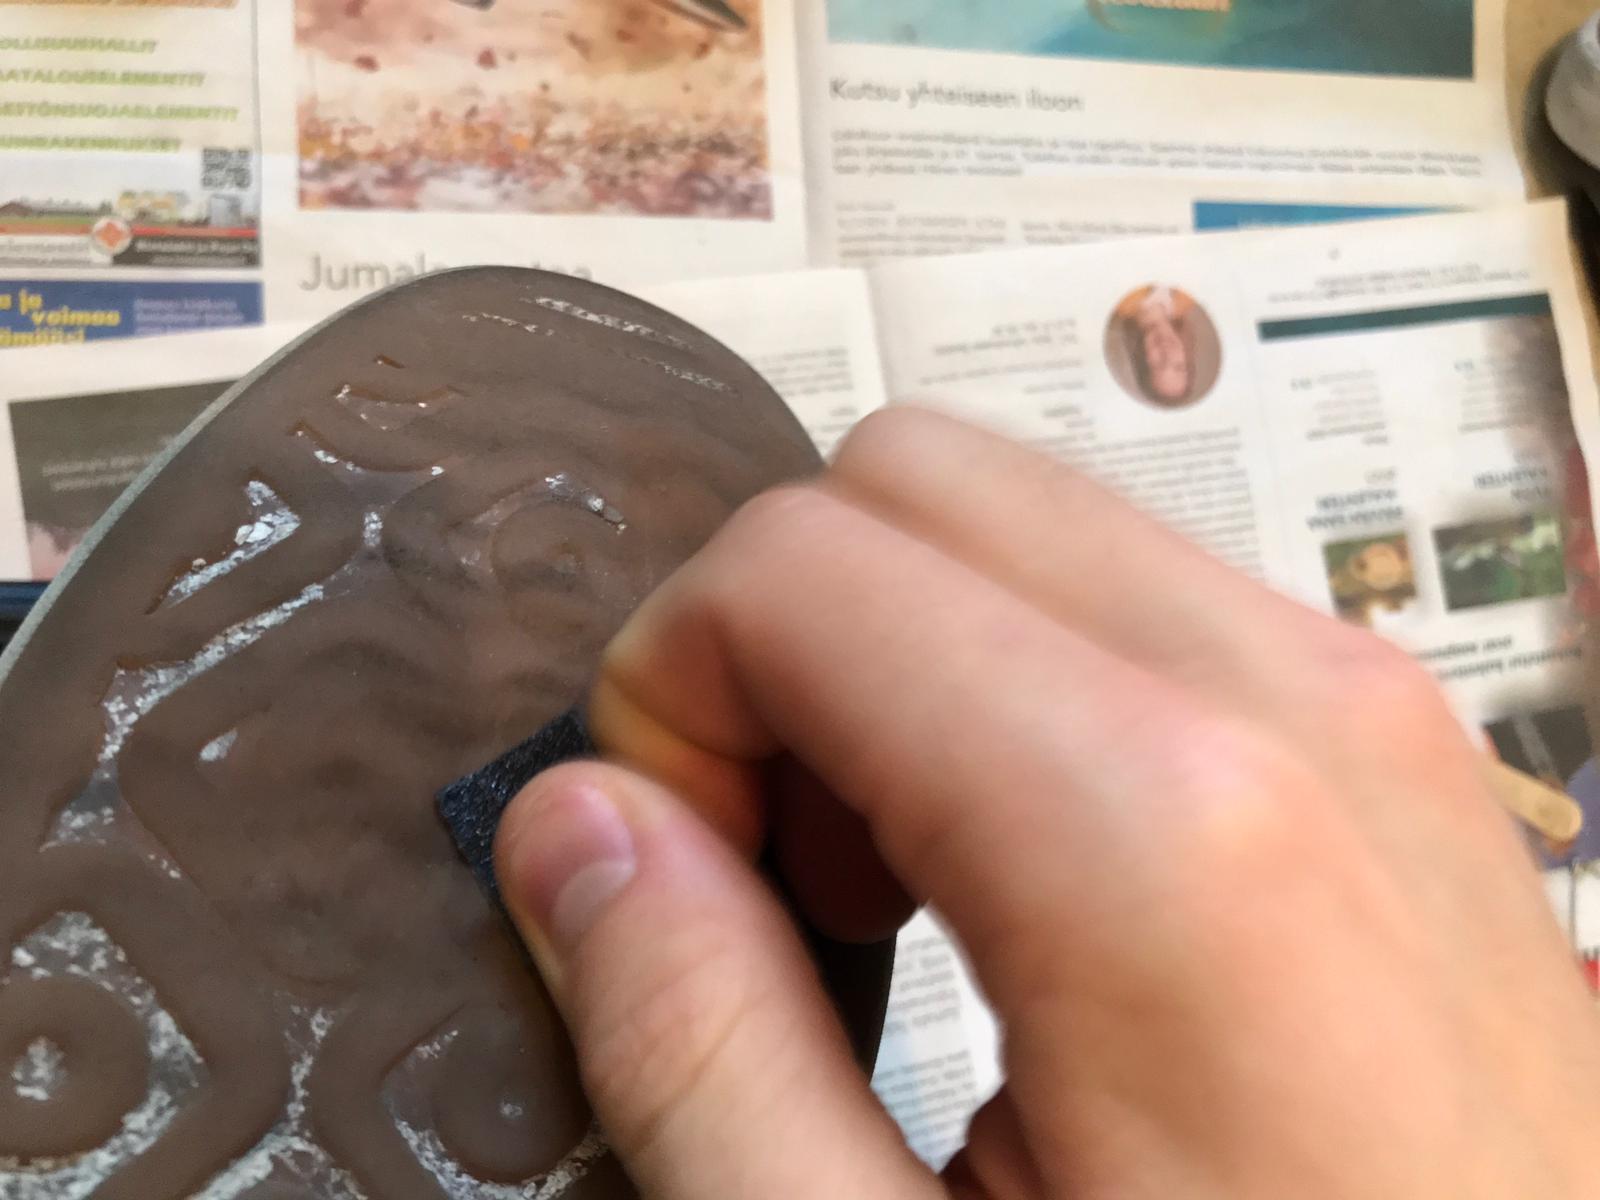
As always, sand the area where you want the patch to be. Then, trace an outline of the patch on to the shoe with a marker, so you'll know where to apply the glue.
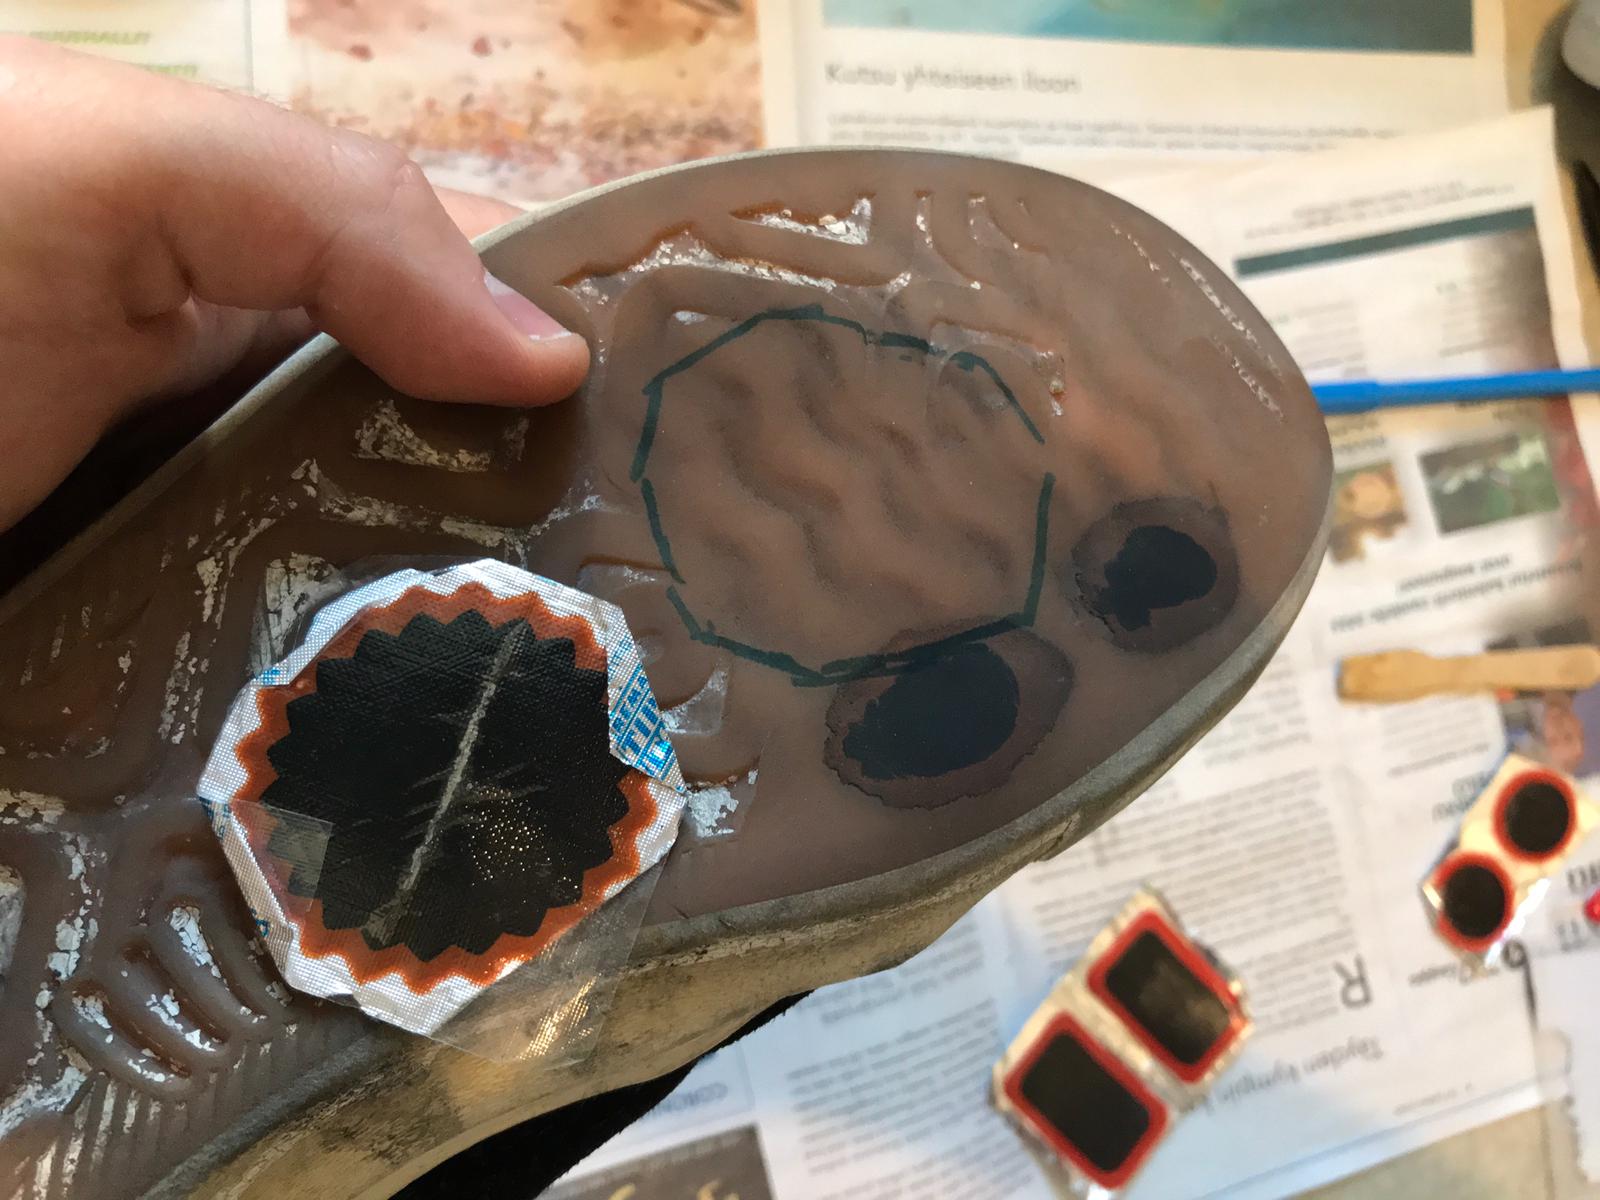
Next, apply the glue from the bike repair kit to the shoe. I don't know kind of glue this is, but it dries and bonds rather fast, around 1-5 minutes.
After that, apply the rubber patch on to the outline. Press with a bit of force so both surfaces stick together.
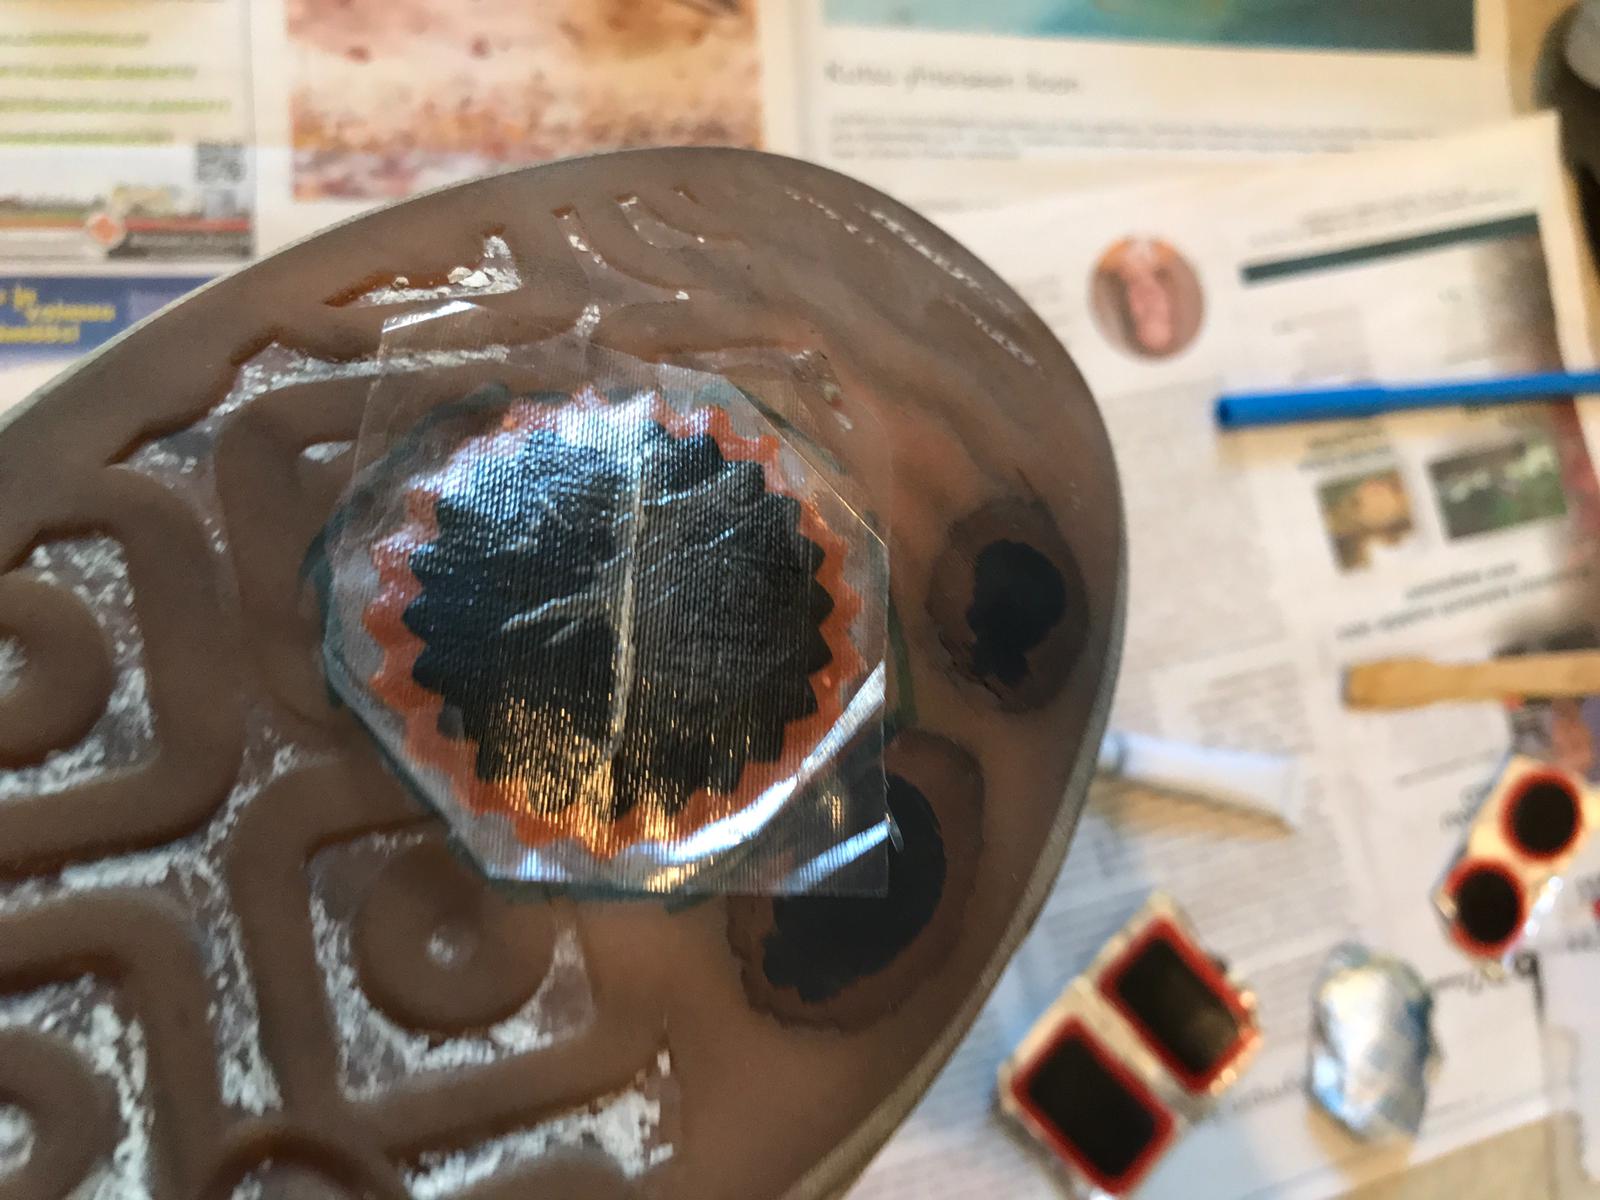
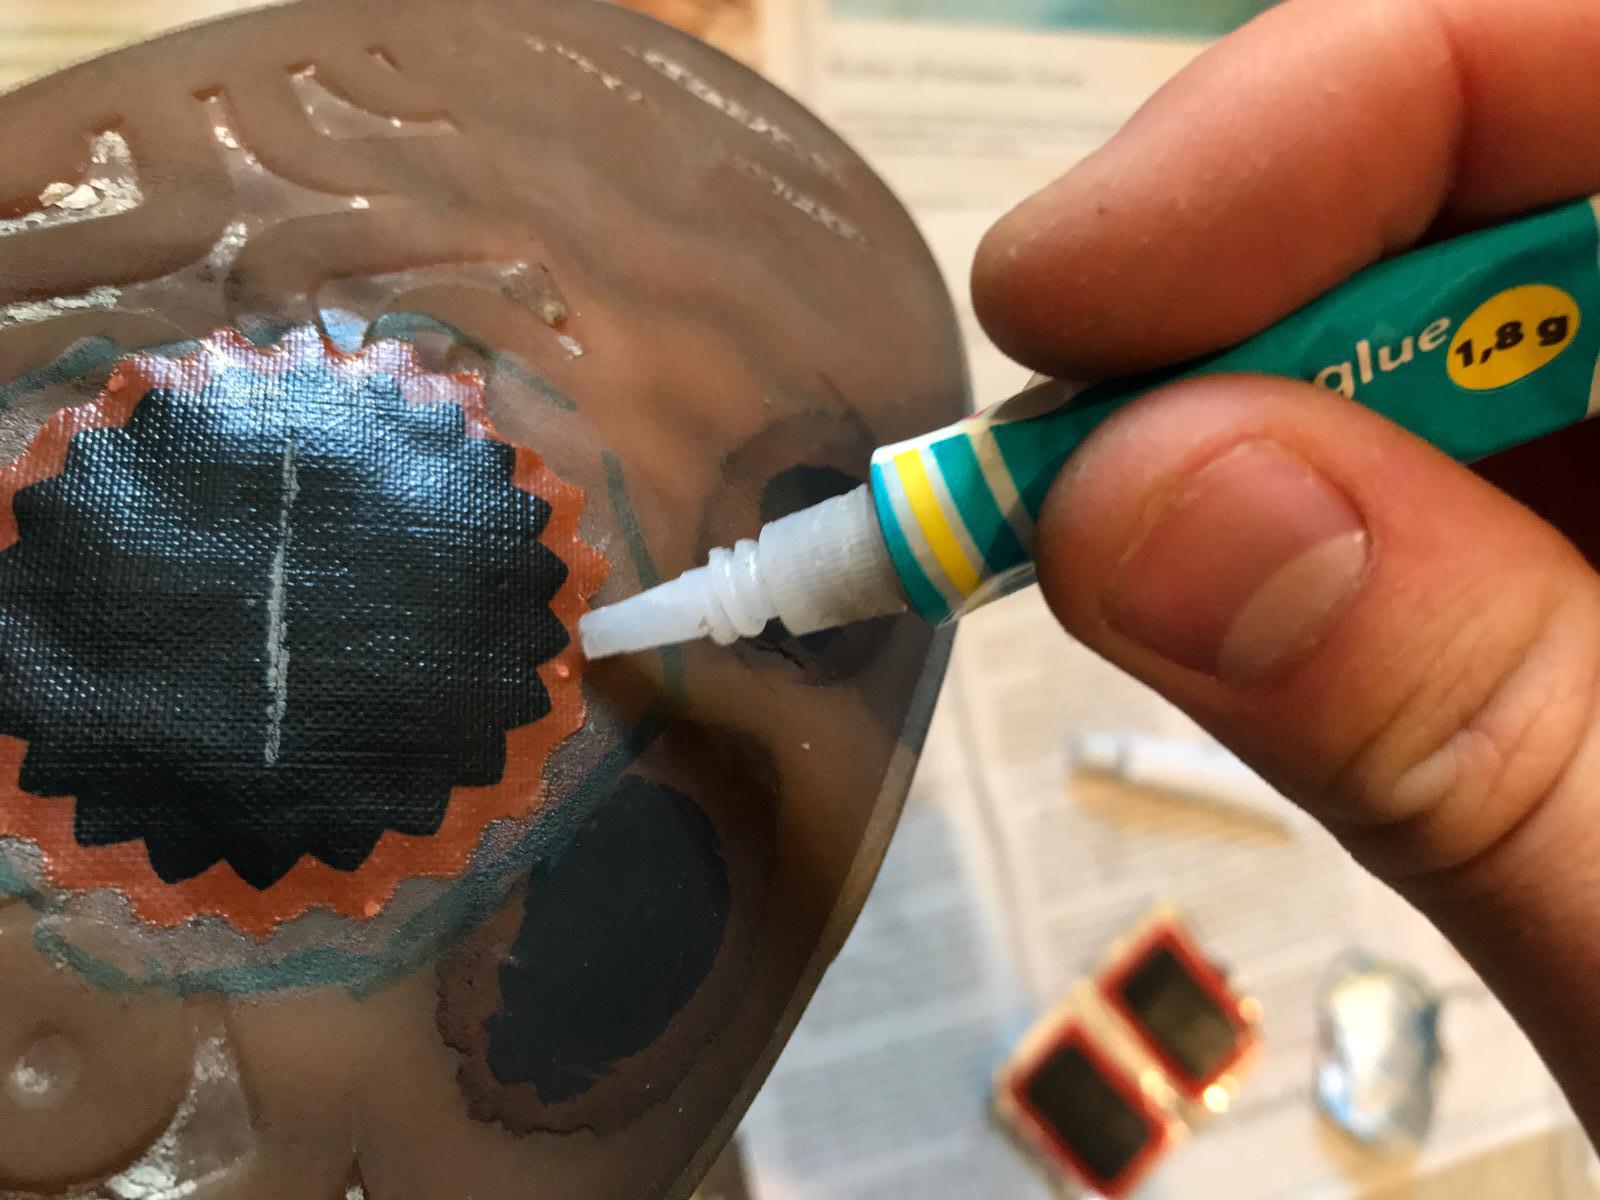
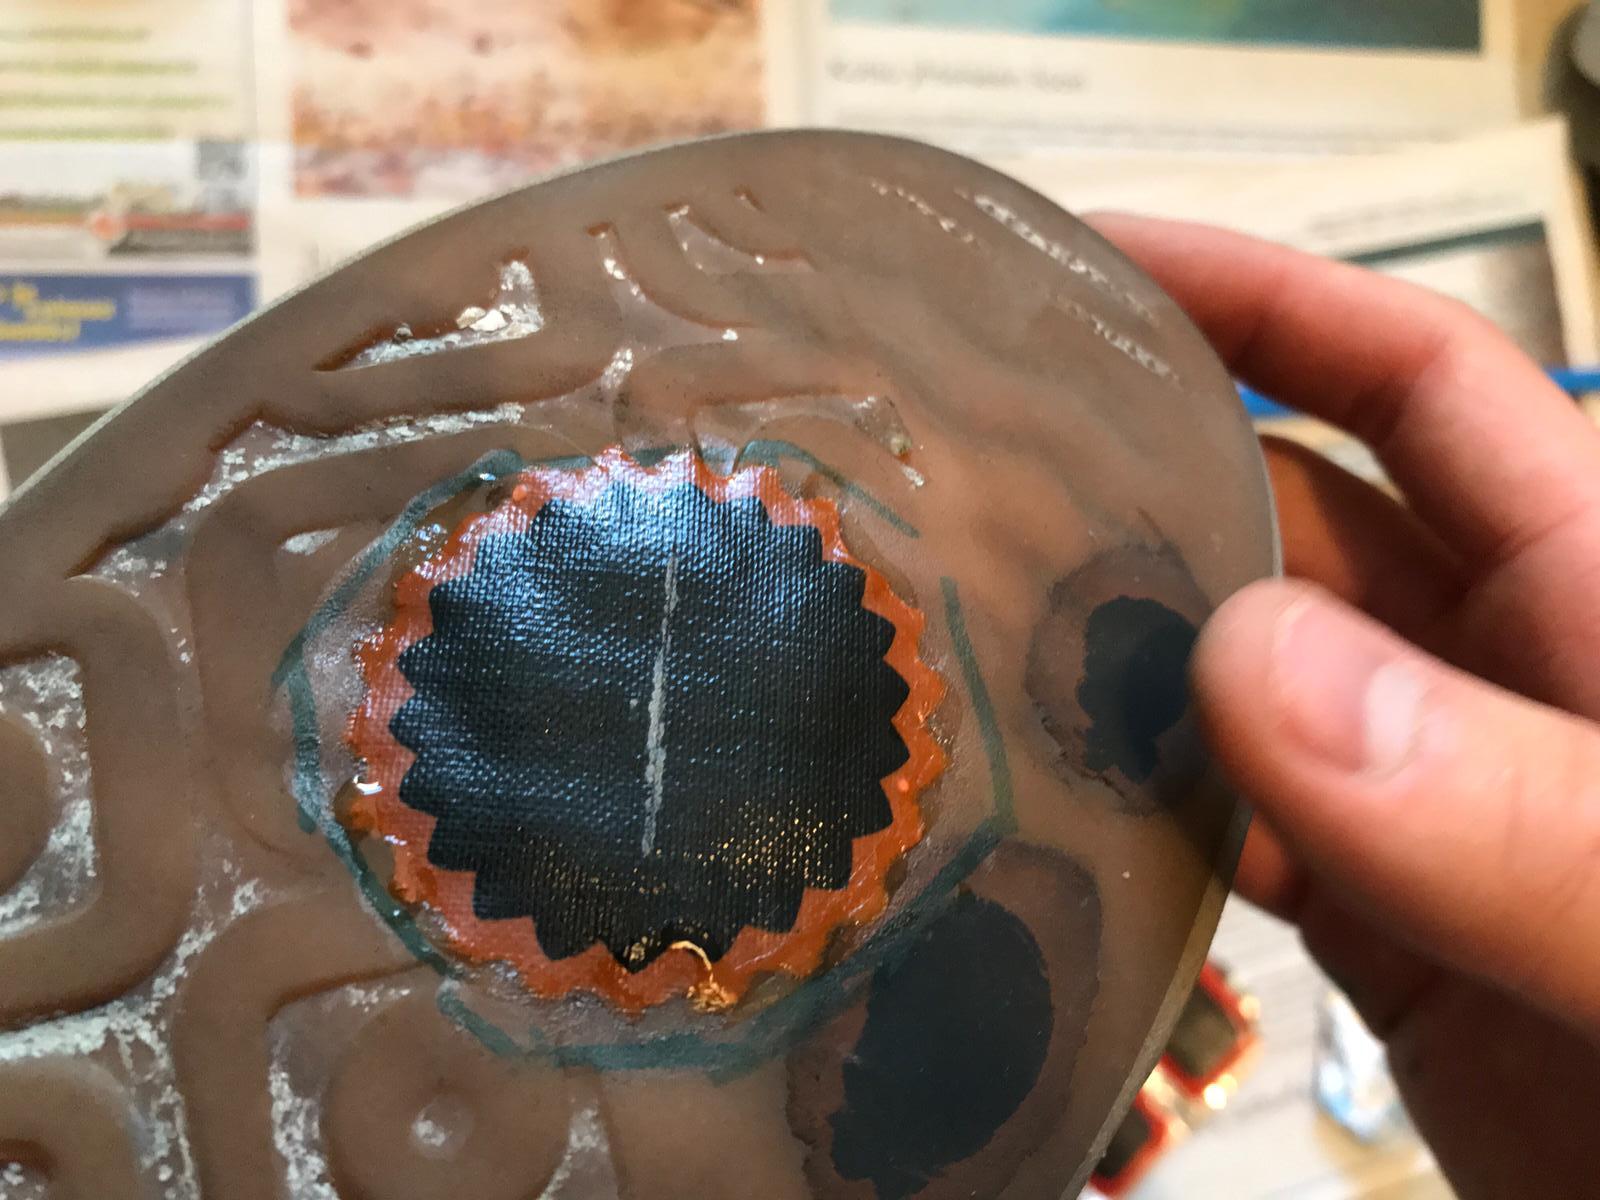
Next, peel the transparent plastic from the rubber patch. From my experience, this requires some amount of delicacy. Sometimes the rubber patch sticks to the plastic, making it difficult to remove the plastic. If you do manage to accidentally peel a corner of the rubber patch, it can be fixed easily by applying superglue around the edges. I would recommend supergluing all of the edges to prevent them from peeling. Let it sit for 5 minutes and it should last for at least 15 sessions.
Conclusion
Thanks for reading my guide! I hope it serves it's function of providing better ways of fixing skate shoes. It might seem like an unnecessary amount of work, but with proper care, you can extend the life of your shoes by a least a month or two. Feel free to comment if you have any other methods or ideas to fixing skate shoes.